Firstly, I tried searching for some suitable references I could use but I couldn’t find any videos or animation examples of a deer or similar animal sitting. Therefore, I decided to just use my imagination and existing knowledge to draw the frame outlines.
I made the canvas resolution according to the ‘deer walking’ animation’s resolution: 375 x 375.
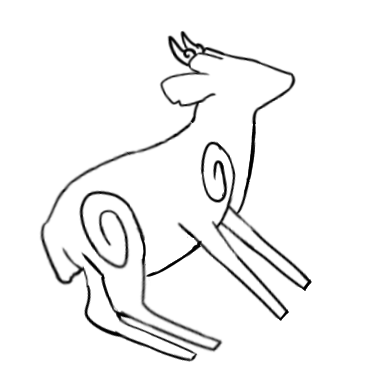
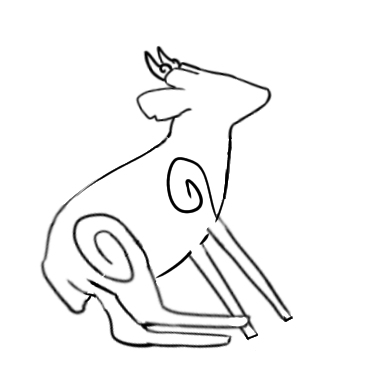
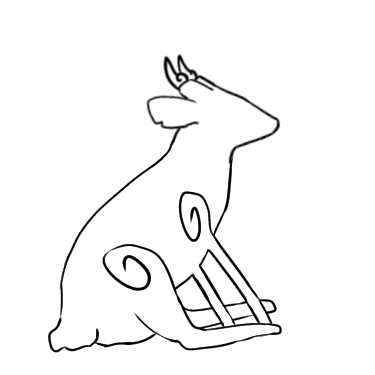
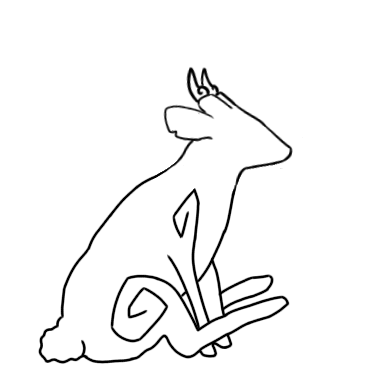
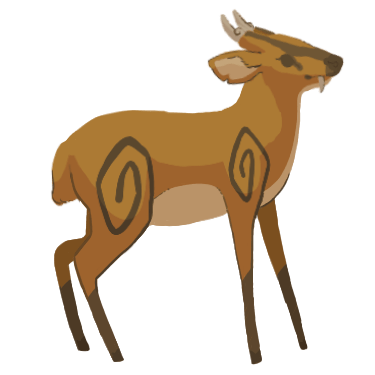
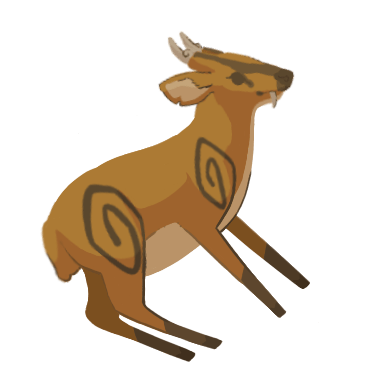
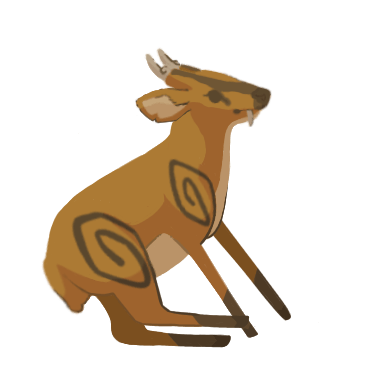
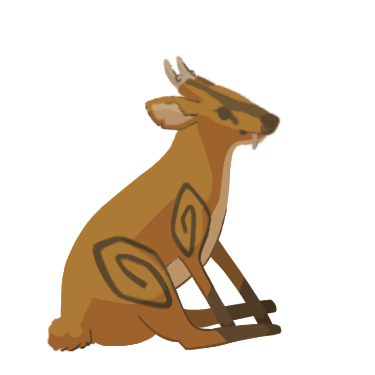
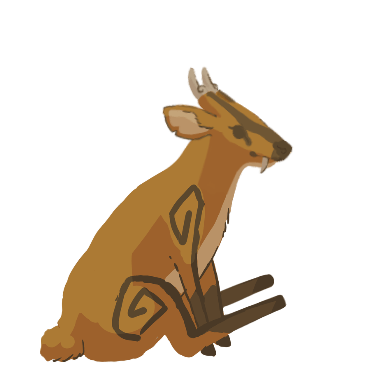
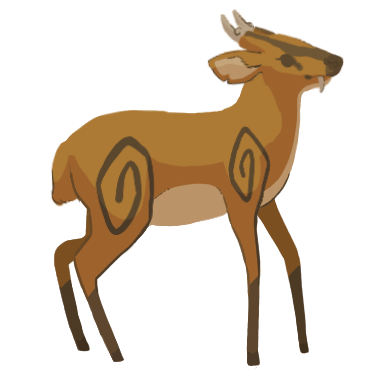
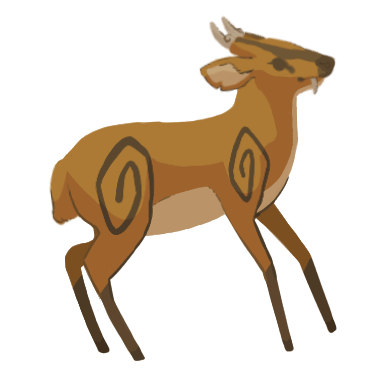
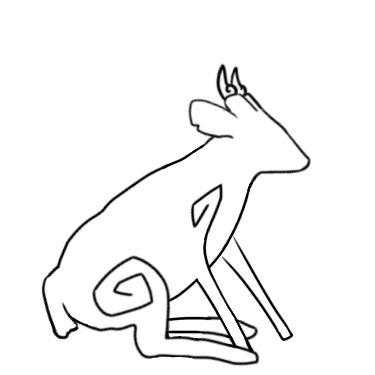
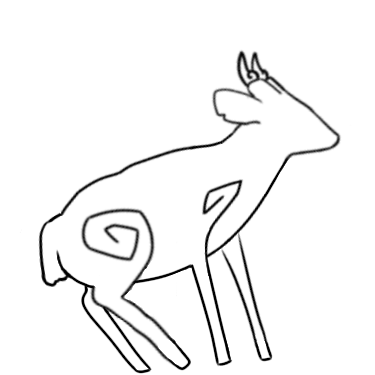
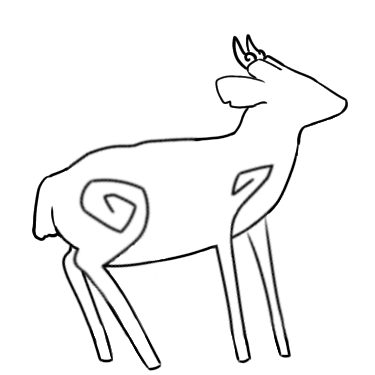
I used the first frame from the deer walking frames as the last frame in this animation sequence. Then, I downloaded the image of the deer sitting from Shannon’s blog as a guide for drawing the first frame. Afterwards, I proceeded to draw the rest of the frames in between whilst using the first and last frames as guidance – the frames in between had to create a smooth transition from the first frame to the last frame.
Shown below are the frame outlines and the resulting GIF. I chose the animation speed to be at 11 fps – the same fps as the walking animations.
I found that the animation seemed to be moving by too fast for me to see whether the transition into the sitting was smooth enough. Therefore, I decided to repeat the last frame five times to ensure that the animation allows the deer to remain sitting for longer before repeating itself.
Shown below is the new GIF.
Drawing the Coloured Frames
Next, I proceeded onto drawing out the final coloured frames.
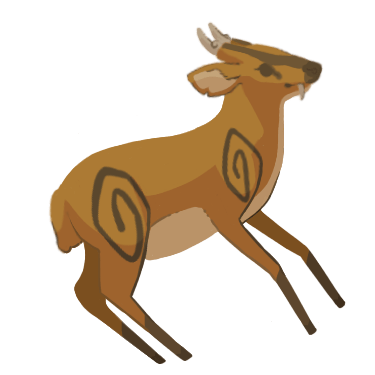
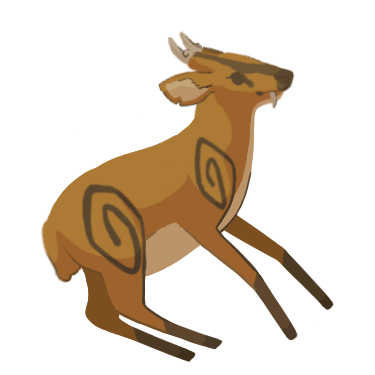
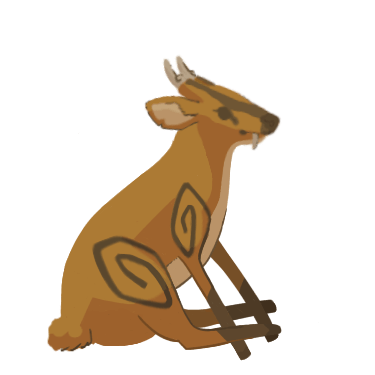
Shown below are the frames in their animation sequence order and the resulting GIF.
After sending the GIF in Slack, it was well-received for the most part. Bernardo said the front legs looked a bit stiff. He also told me that the front legs seem to shrink partway through the animation and asked if I could fix that. I told him that I would work to solve both issues.
I decided to first solve the ‘shortening legs’ issue by redrawing certain frames so that the leg’s do not drastically change lengths.
Next, I began solving the ‘stiff legs’ issue by redrawing certain frames to make it so that the front legs bend a bit as the deer falls to a sitting position.
Shown below are the newly altered frames in their animation sequence order and the resulting GIF.
After sending the new GIF in Slack, it was well-received.
Animating the Deer Getting Up
Drawing the Animation Frame Outlines
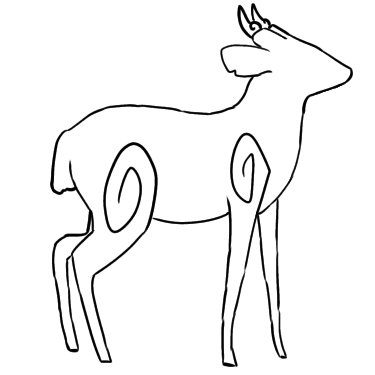
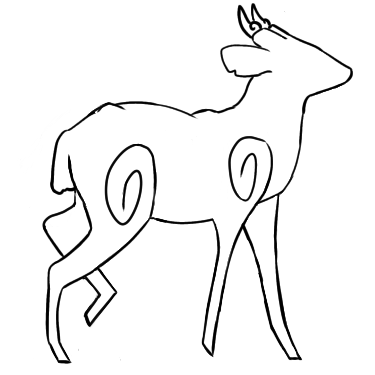
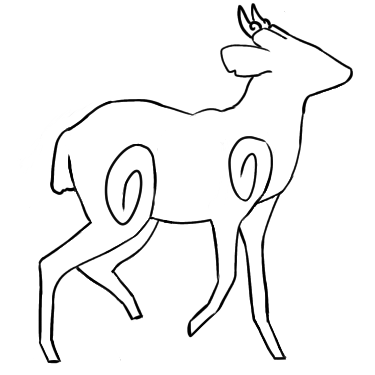
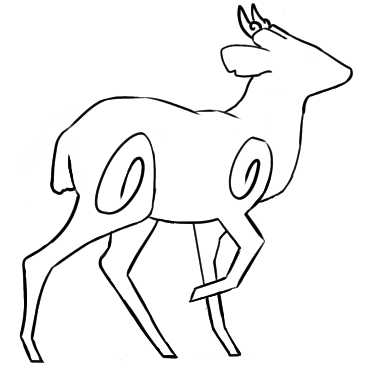
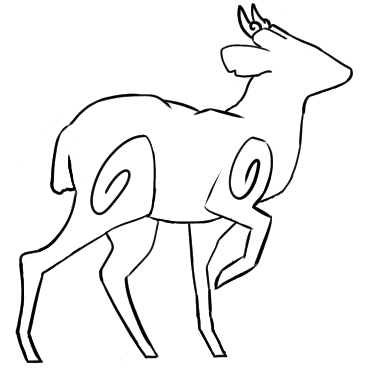
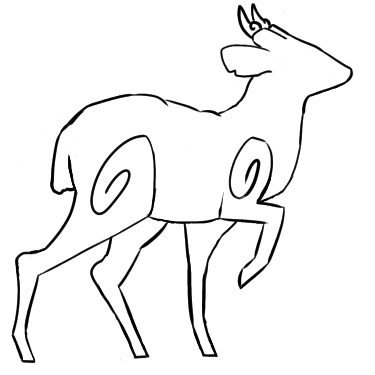
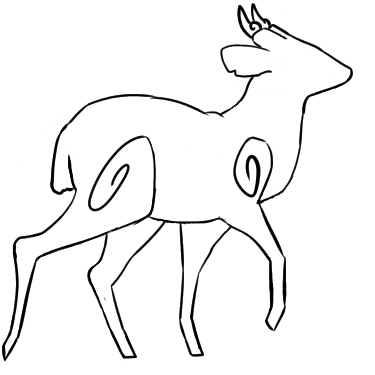
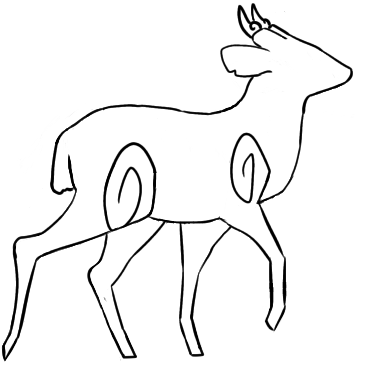
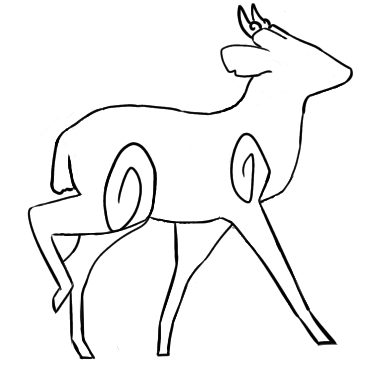
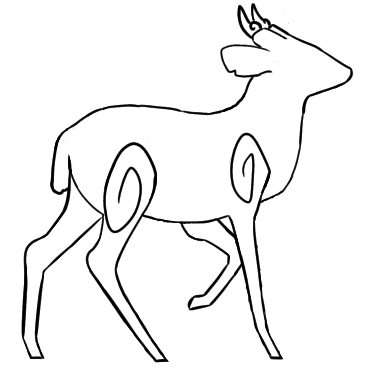
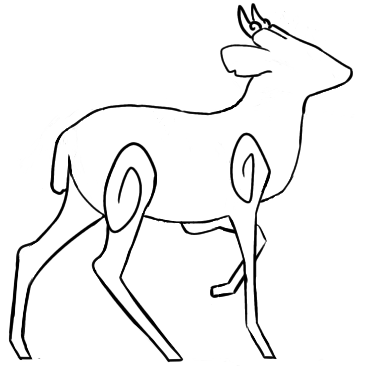
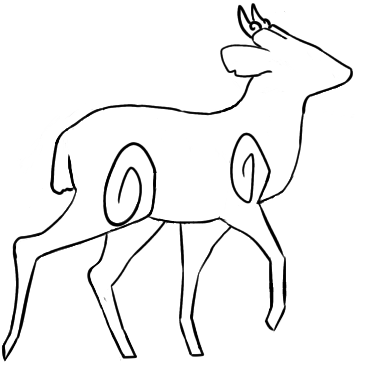
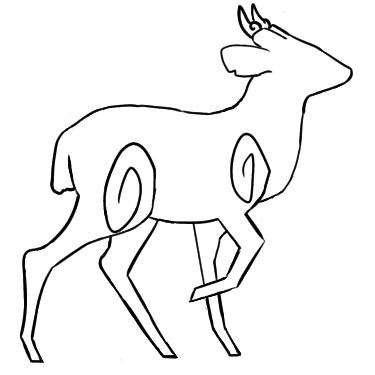
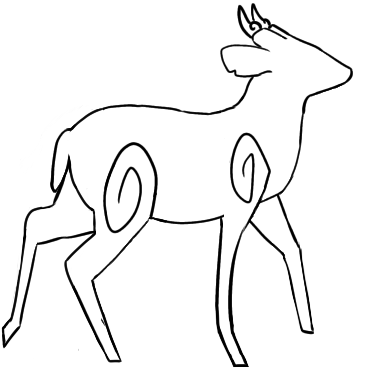
I also kept the canvas resolution 375 x 375 when making the deer’s getting up animation. Firstly, I used the first frame from the sitting animation as the last frame in this animation. I also used the last frame from the sitting animation as the first frame in this animation. Then, whilst using the two existing frames as guidance, I began drawing the frames in between.
Shown below are the frame outlines and the resulting GIF. I chose a speed of 10 fps as 11 fps appeared to be slightly too fast.
Once again, I encountered the issue where the GIF appears to be going by too fast for me to see if the movements are smooth enough between the first and last frame. There needed to be more time dedicated to showing the deer standing before the animation loops again. Thus, I decided to repeat the last frame five times (just as I had done in the sitting animation) to ensure that the animation allows the deer to remain standing for longer before repeating itself.
Shown below is the new GIF.
I saw no further issues with the animation so I moved onto drawing out the final frames.
Drawing the Coloured Frames
I proceeded onto drawing out the final coloured frames.
Shown below are the frames in their animation sequence order and the resulting GIF.
After observing the animation, I found that it still seemed to be moving too quickly between actions. To remedy this, I tried to make the animation show the deer sitting for longer by repeating the first frame three times.
Shown below is the new GIF.
After sending the GIF in Slack, it was well-received.
As additional research, I thought it would be a good idea to find some examples of animated deer walk cycles. It helped me explore different ways of animating deer walk cycles as well as helping me see which type of walk I wanted to create.
To begin with, I decided to draw the outlines of the deer’s movements before I drawing the final coloured frames. Drawing the outlines first meant that I could troubleshoot any issues I find along the way without wasting my time drawing out coloured frames during the process. It also meant that troubleshooting issues could be done in a more timely manner.
I chose to use Deer Walk Cycle 2 as a rough reference for my ‘deer walk’ animation frames as I liked the animation style that was displayed in the video the most out of all the animation videos. It was short, and had a nice walk style that didn’t seem too stiff.
Firstly, I screenshot the different animation frames from the video so that I could use them as reference for when I draw my own animation frames.
Next, I used the screenshots as reference and drew my own animation frames for the deer walking. I made the canvas resolution 375 x 375 as I was told by Bernardo that this was the resolution the deer’s walking animation should be in.
Initially, I drew the my own animations frames using the screenshots above as reference in Opentoonz but the program crashed on me a few days later. Opentoonz kept refusing to open and crashing before it could so I ended up losing all the frames I had drawn. This meant that I had to redraw everything from scratch in the other program I had – Krita. I had used and animated in Krita before so I didn’t need to familiarise myself with it. Instead, I just began drawing the frames again.
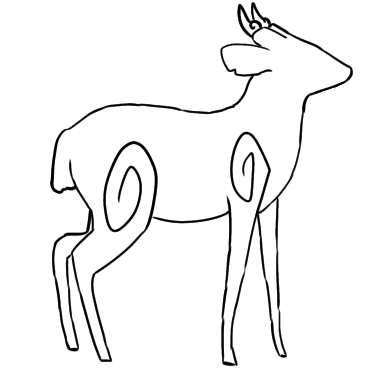
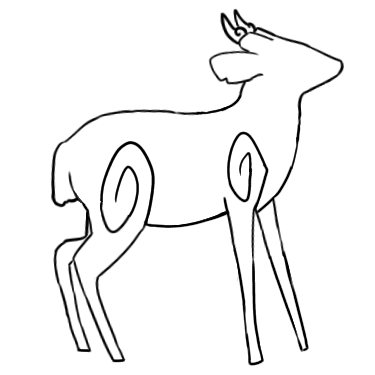
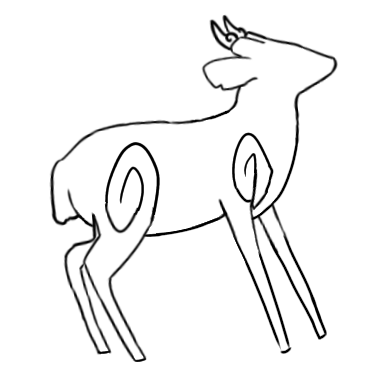
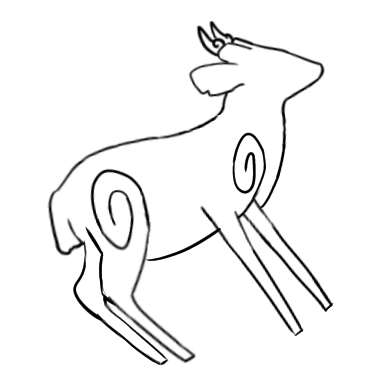
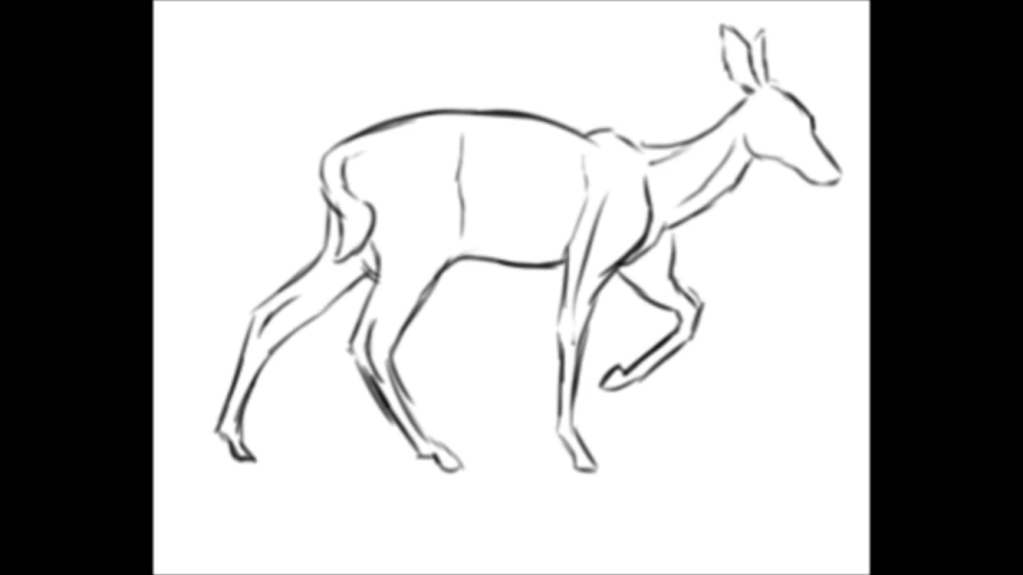
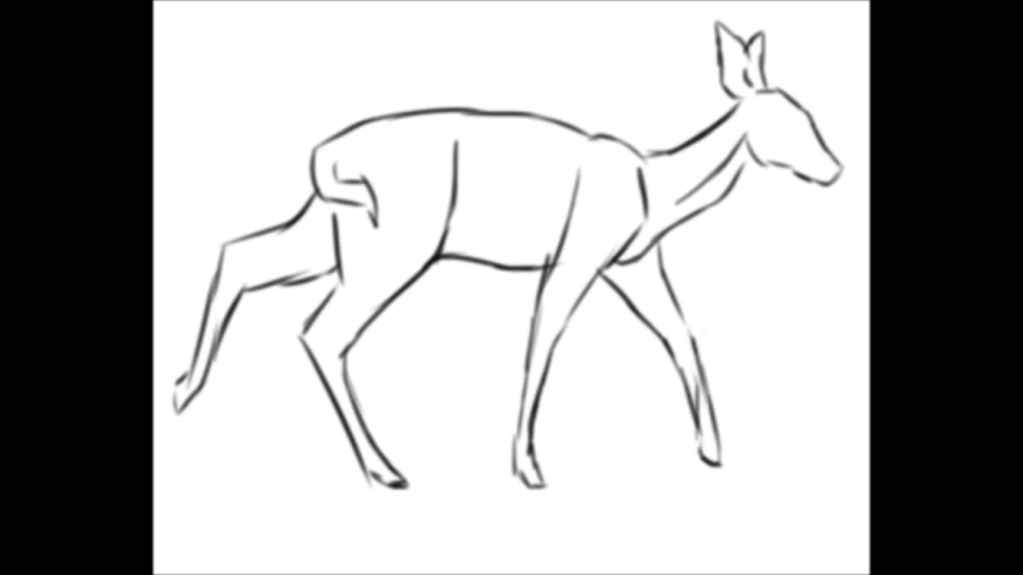
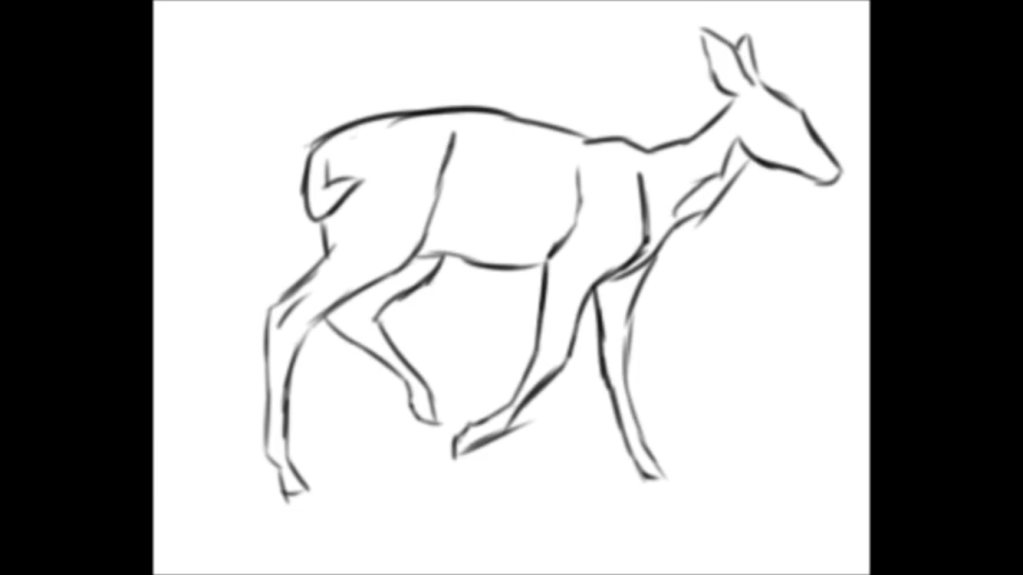
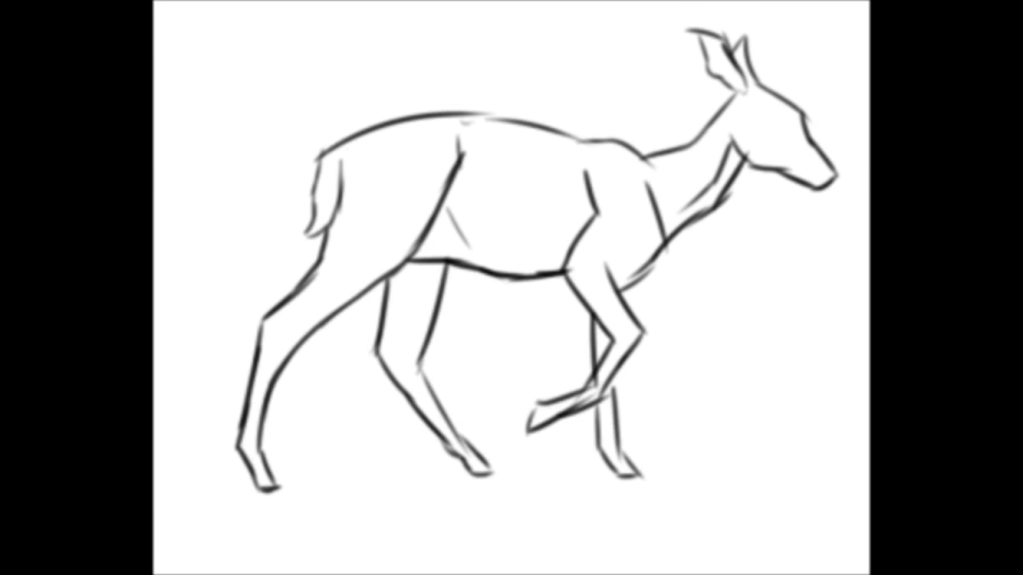
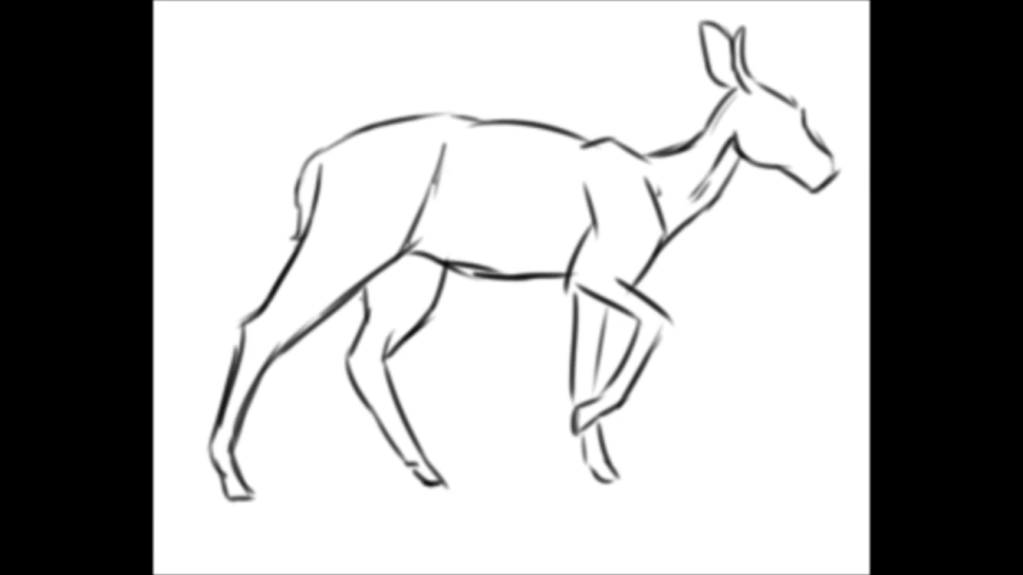
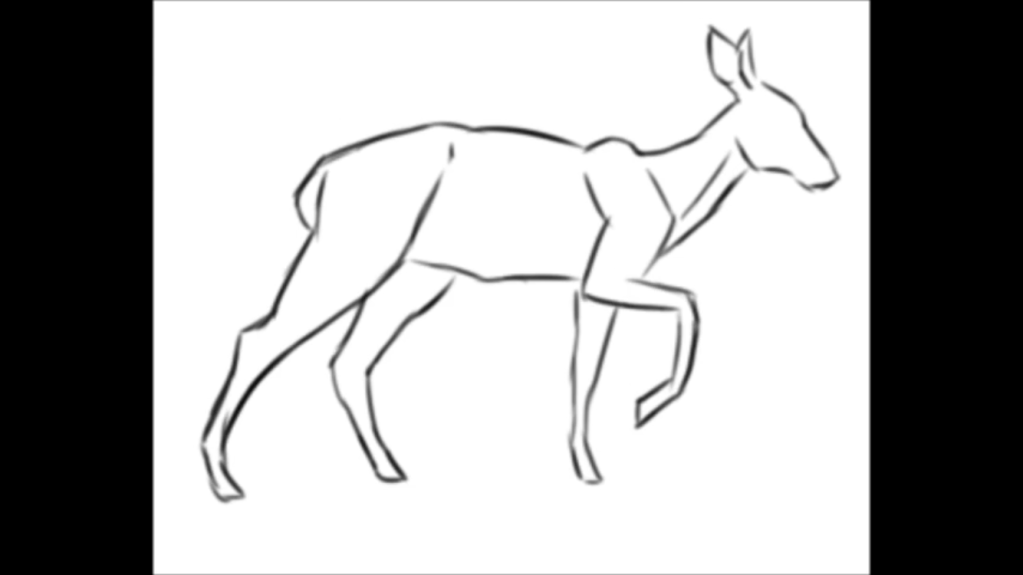
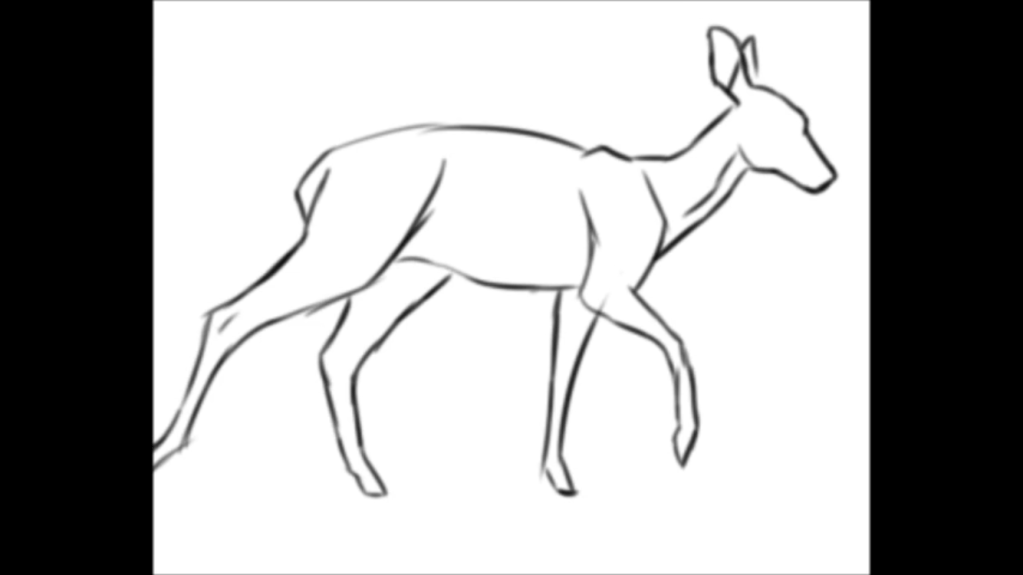
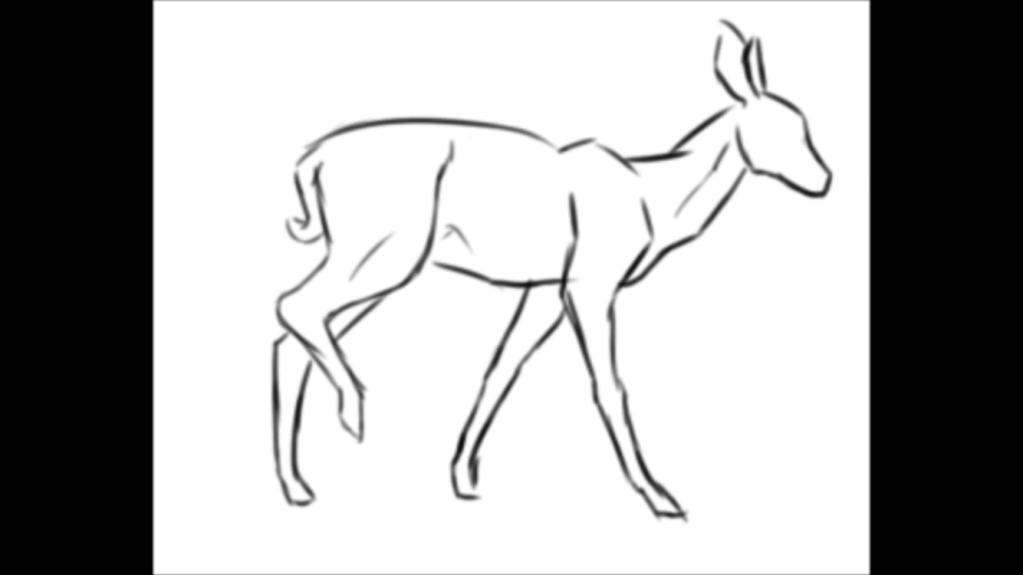
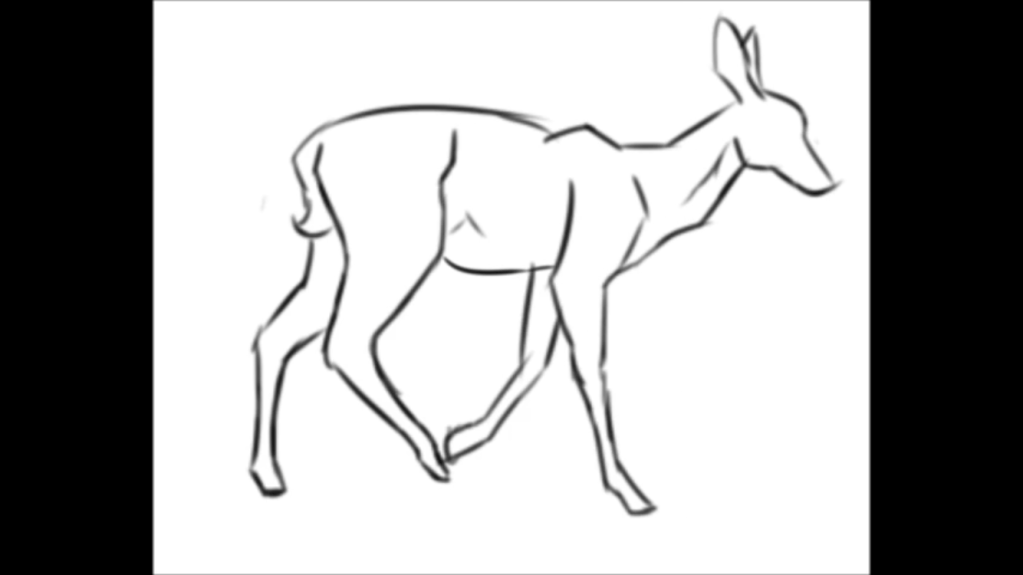
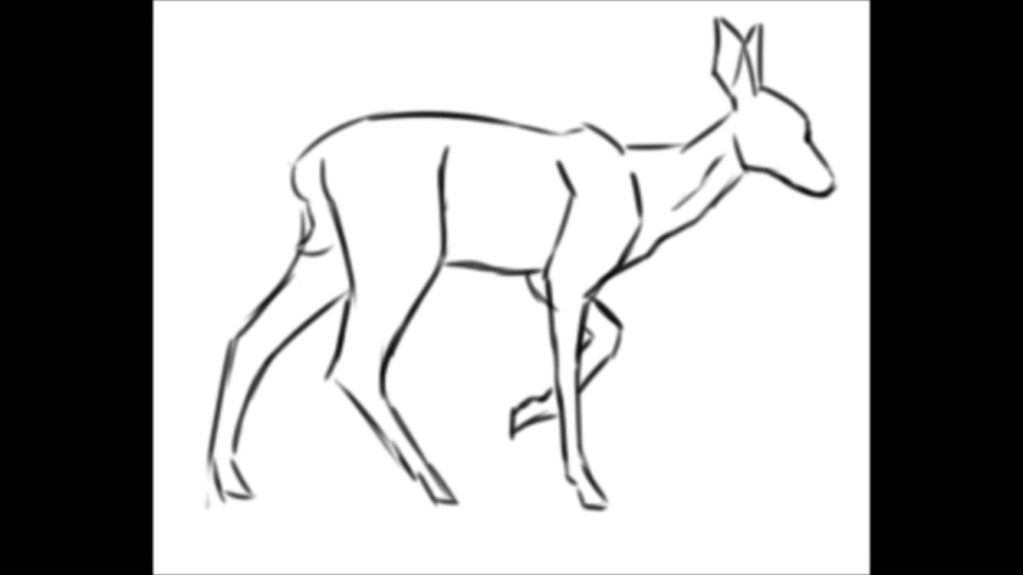
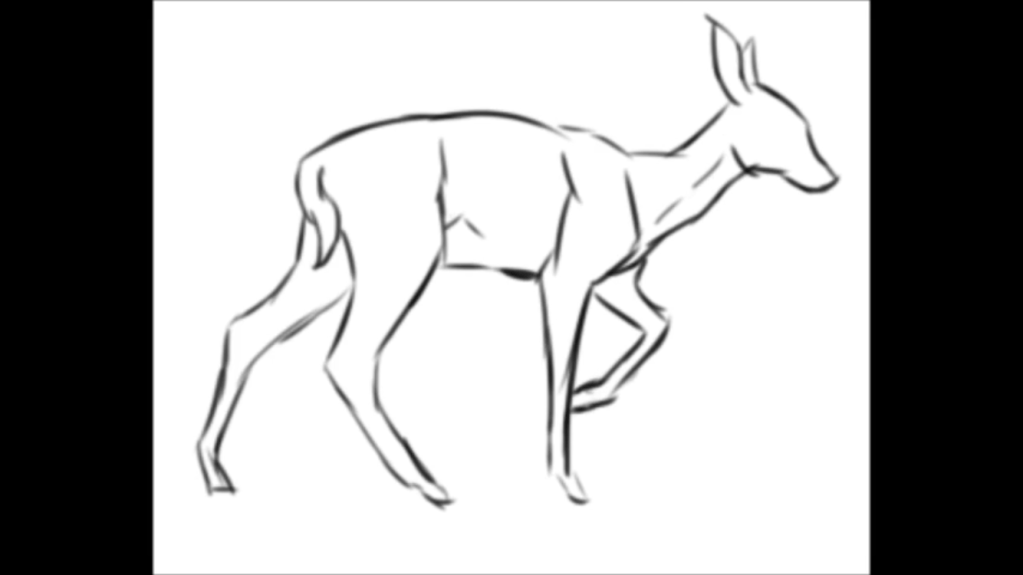
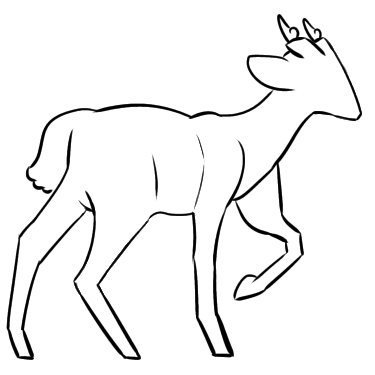
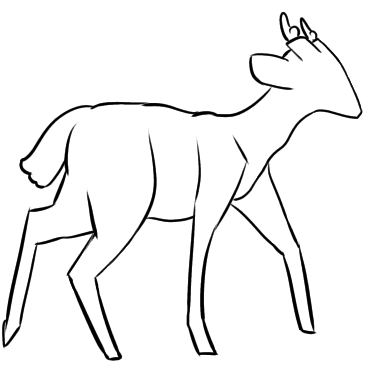
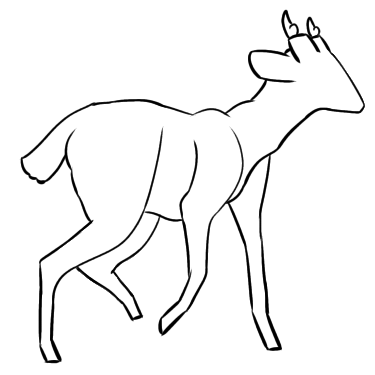
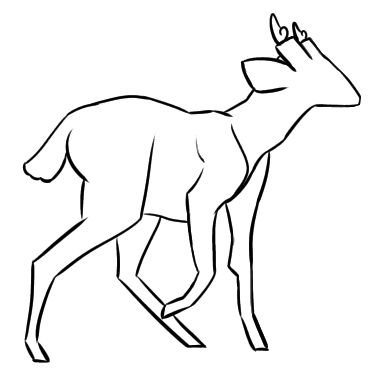
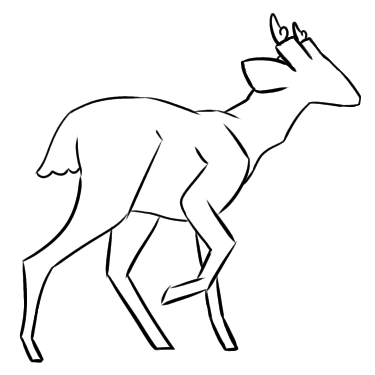
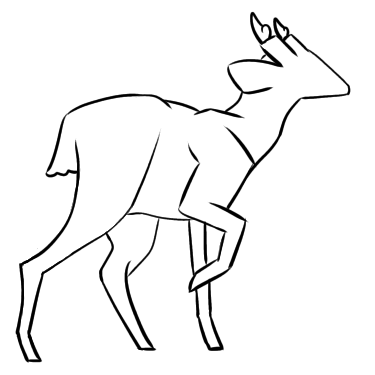
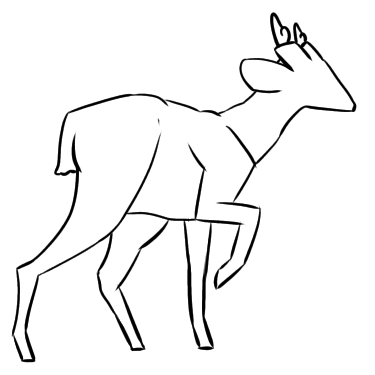
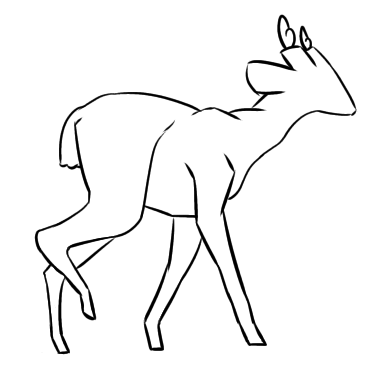
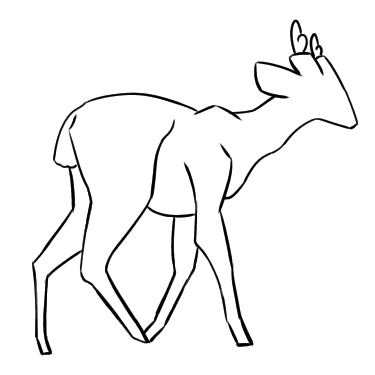
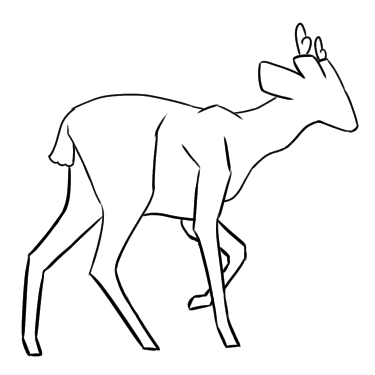
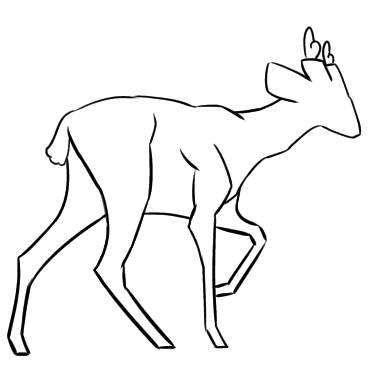
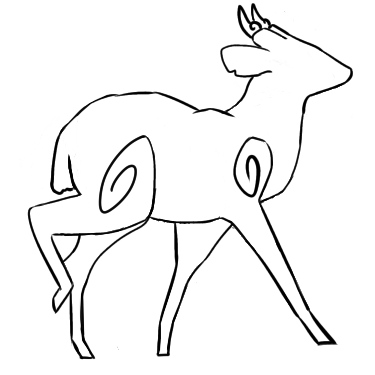
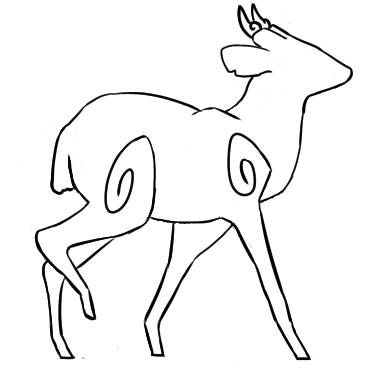
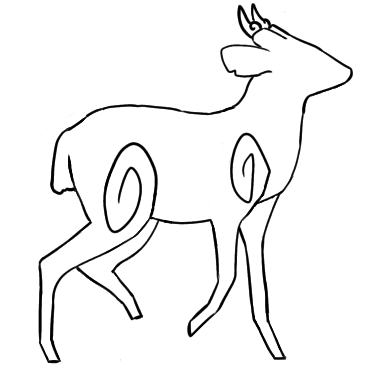
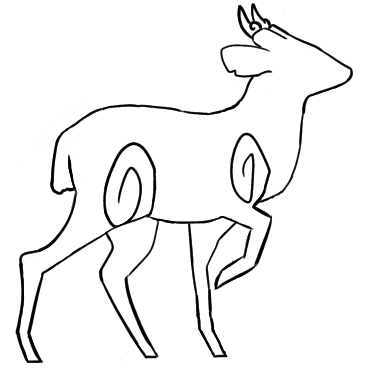
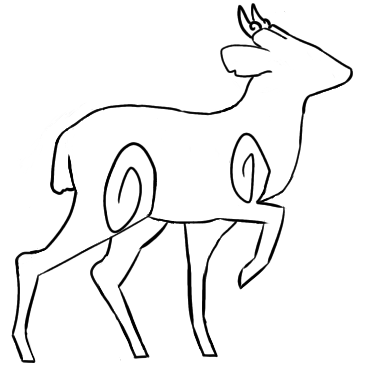
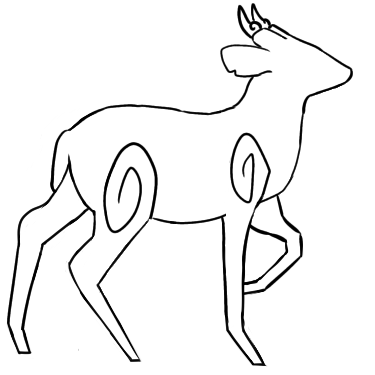
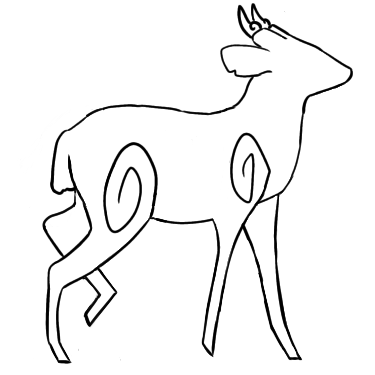
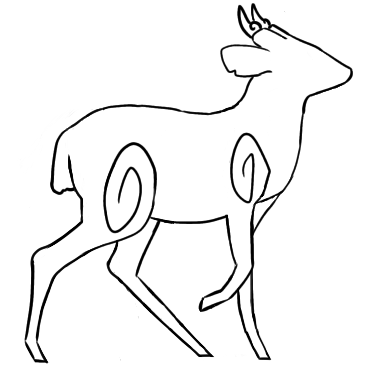
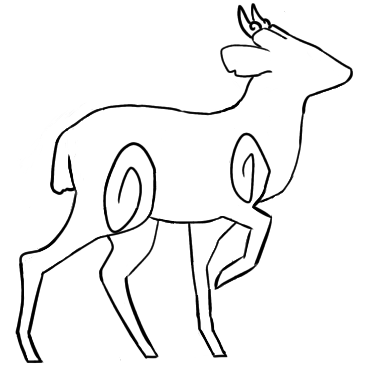
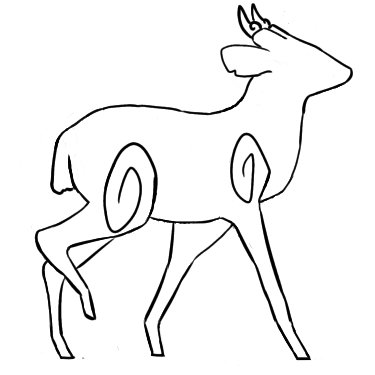
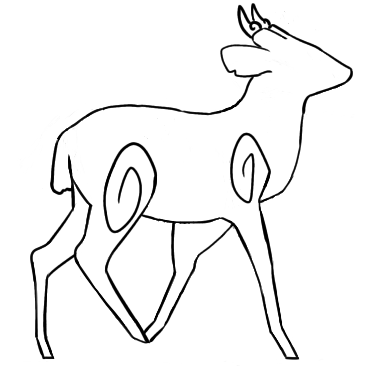
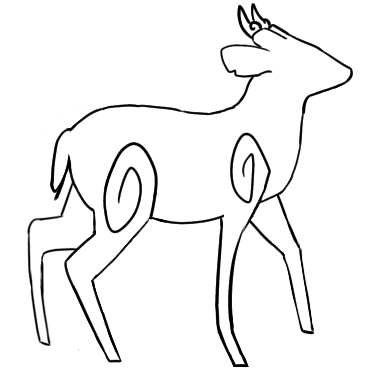
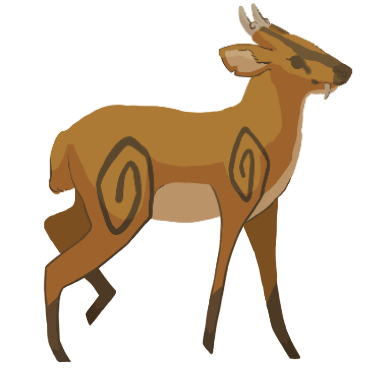
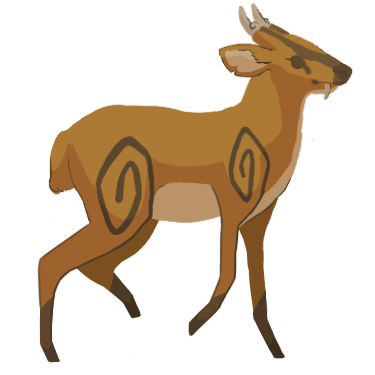
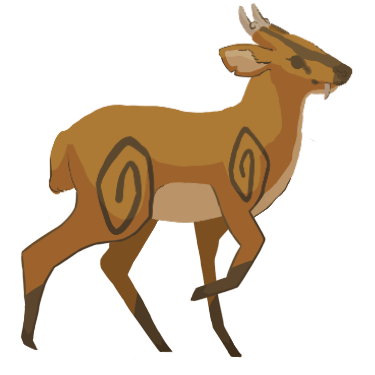
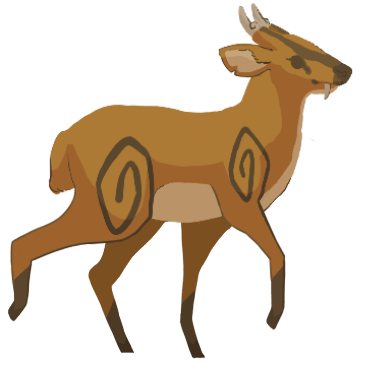
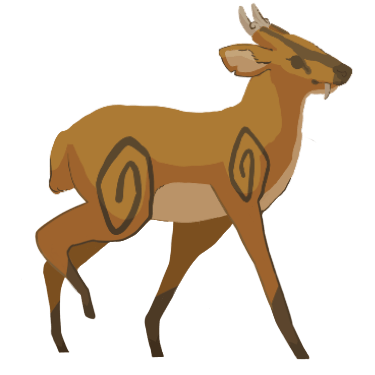
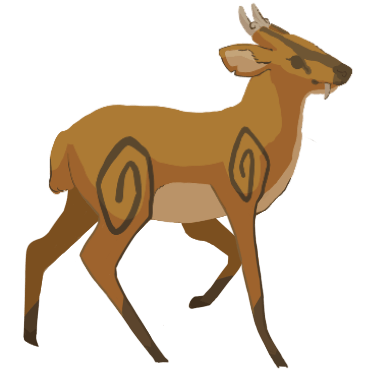
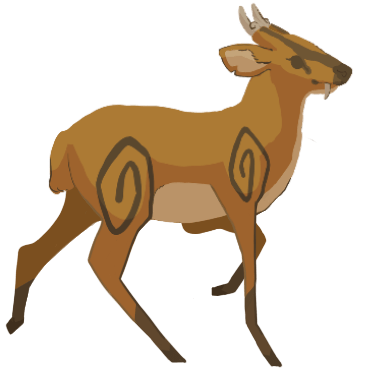
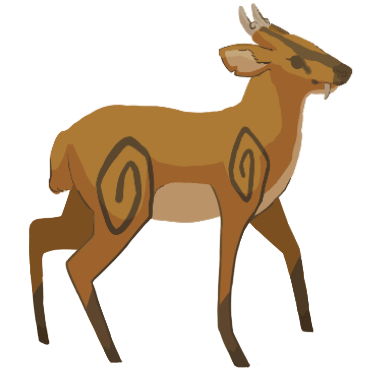
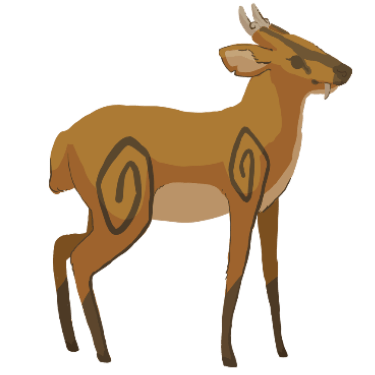
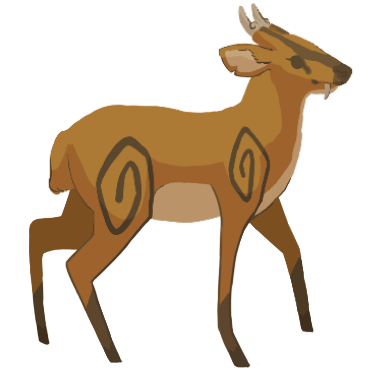
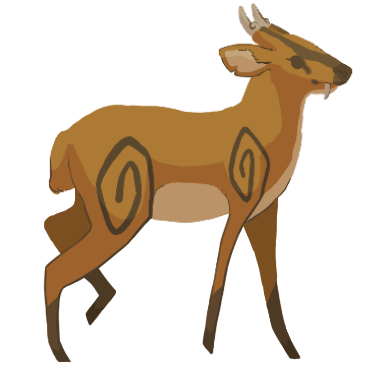
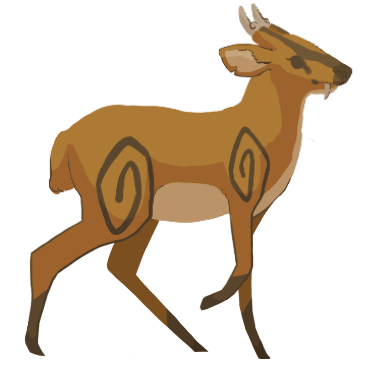
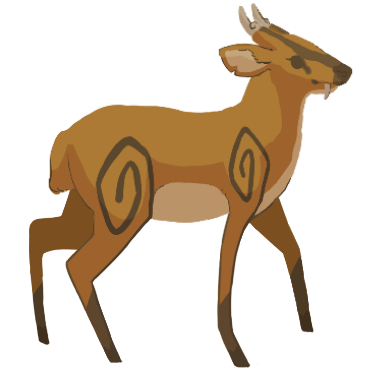
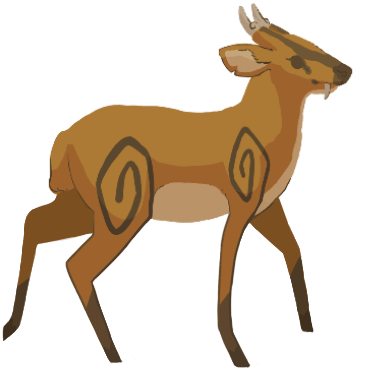
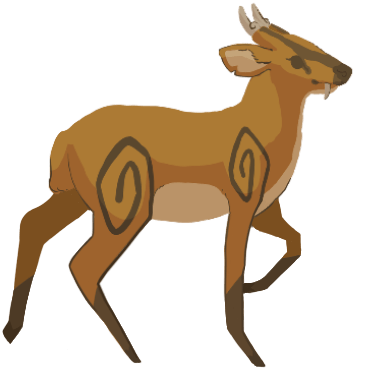
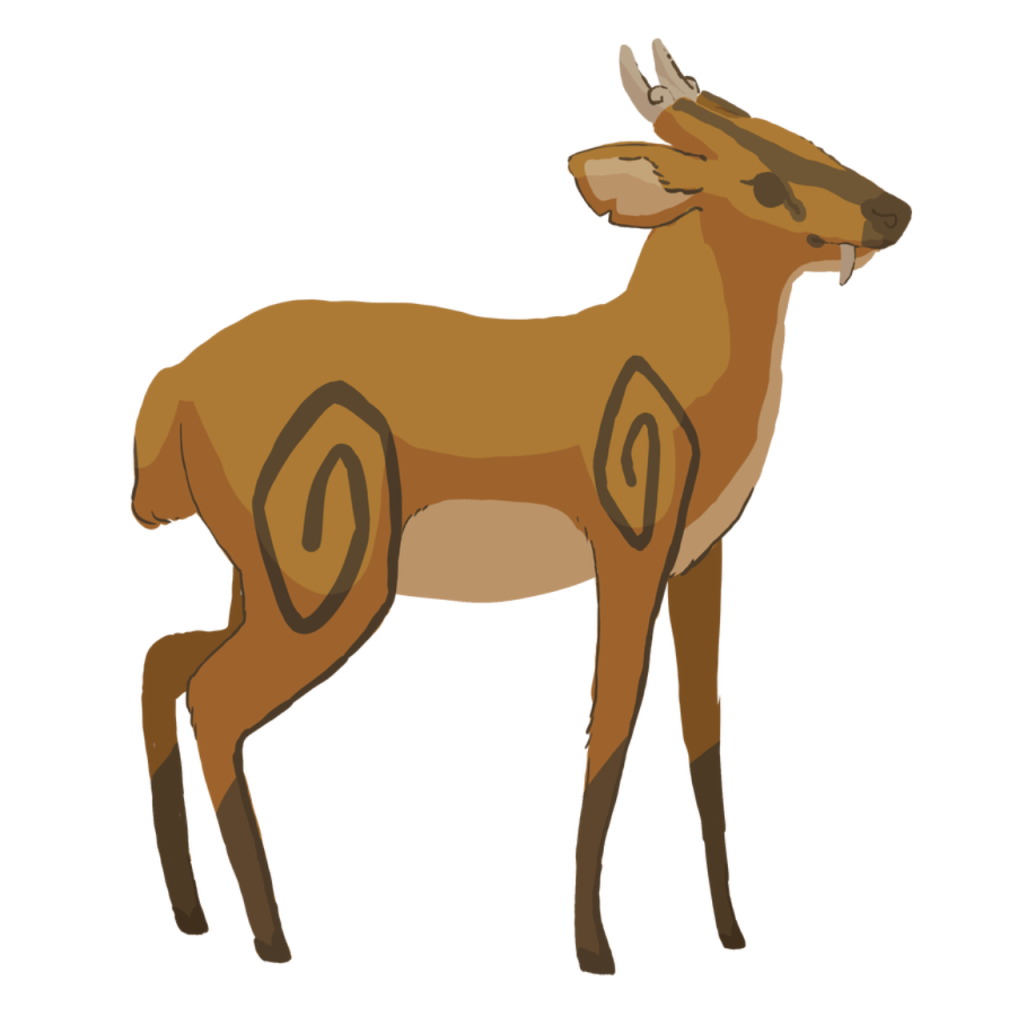
Shown below are the rough animation frames I drew (the first frame was drawn using the image of the deer standing from Shannon’s blog as reference).
Next, I decided to test out the animation frames by playing them as an animation. The default frame rate in Krita is 24 fps, which was too fast for this animation so I decided to decrease the fps until the animation was playing at a reasonable pace. This frame rate was 12 fps.
After playing the frames as an animation, I found several issues with the frames and thought of ways to fix them before executing the solutions.
List of issues & solutions the head and neck don’t move smoothly/the head and neck change sizes throughout the animation – make it so that the head, neck and body remain stationary throughout the animation to make for a more smooth animation – only the legs need to move in order to make the deer walk the tail changes sizes throughout the animation – make it so that the tail remains stationary throughout the animation to make for a smoother animation – only the legs need to move to make the deer walk the animation doesn’t loop smoothly – make an extra frame to make for a better transition between the last and first frame
I first decided to execute the first two solutions and redraw the existing animation frames before creating a new frame so that the new frame would have a better foundation to go from.
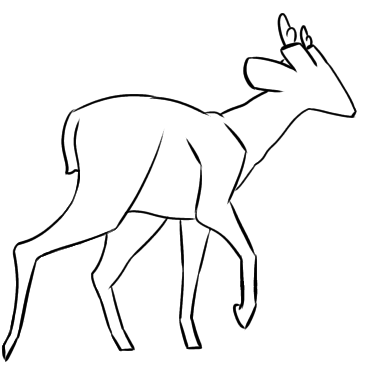
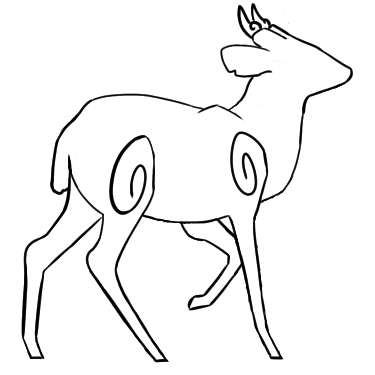
Shown below are the redrawn animation frames.
Next, I tested out the new animation frames by playing them at 11 fps (this fps seemed to better suit the walking speed). Shown below is the animation GIF.
After playing all the frames as an animation, I decided to try playing the animation without including the first standing frame to ensure that the rest of the frames can play smoothly and loop successfully (since they are all from the same reference whilst the first frame was based on a different reference).
Shown below is the animation GIF excluding the first frame.
I found that there was another issue with the new frames after looking at the GIFs – the swirls and back don’t move smoothly. Thus, I decided to make the swirls and back stationary as well to make for an even smoother animation.
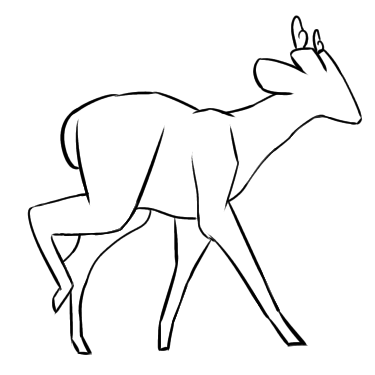
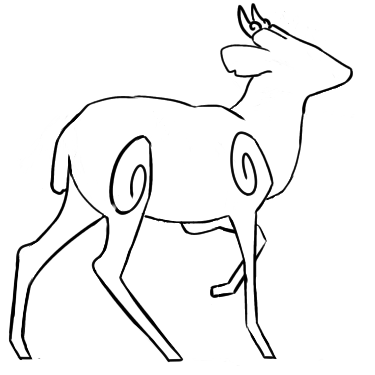
Shown below are the altered animation frames.
Then, I decided to play the frames as an animation to see if there were any more issues I needed to fix before creating the new frame, which should sit between the first and last frame.
There were two issues I discovered when watching the GIF. The more minor issue was that the frontier back leg touches the deer’s butt in some frames. In order to solve this problem, I decided to redraw the frames where the problem occurs.
However, I decided to tackle the more major issue first as it would be more difficult to solve. The major issue I found with the new animation frames – the back leg’s swirl moves strangely due to the back leg’s movements going high enough to touch it. During the redrawing process, I found that I had to redraw parts of the swirl to accommodate the back leg in some frames. I decided to fix this issue by either reshaping the swirl or reshaping the back leg in certain frames. In the end, I tested out several different solutions.
The first solution I tested out was changing the swirl’s shape in certain frames so that the back leg doesn’t touch the swirl. This would prevent the swirl from looking as if the leg is causing its movements. Shown below are the fixed frames and the GIF showcasing the frames as an animation.
This solution din’t seem to solve the issue since the swirl still moves strangely. Therefore, I decided to try making the swirl the same shape as the other frames to ensure it doesn’t move strangely, and alter the back leg’s shape to accommodate the swirl instead.
Shown below are the fixed frames and the frames as a GIF.
The new frames seem to solve the issue – the swirl no longer moves strangely. However, I did find that the back-most leg in the first frame above (uppermost left) wasn’t the same shape as in the other frames. Thus, I decided to also fix that. Shown below is the old frame (left) and the altered frame (right).
After solving this issue, I moved onto solving the other issue by redrawing the frames where the frontier back leg touches the deer’s butt. Shown below are the altered frames.
After solving this issue, I drew a new frame to make the transition between the first and final frame smoother. I used the third frame (shown below on the left) as a reference as it closely resembled the first frame – its legs are only slightly different to the first frame’s. I also kept in mind the first and last frame whilst designing the new frame. Shown below (on the right) is the new frame. I only needed to change the frontier back leg’s position as the other legs were in good positions for acting as a transition between the first and last frame.
Shown below are all the final frames and a GIF showcasing the frames as an animation.
After playing the frames as an animation, I saw that the animation still failed to loop smoothly despite the adding new frame. I deduced that I needed to reorder the frames as opposed to creating more/changing transition frames.
I began by scrutinising the transitions between each frame in the current order and found that the last few frames and the first few frames consisted of the deer’s back-most back leg moving outwards, then inwards into the first frame, and then outwards again. All this occurs in a short period of time, which prevents the animation from looping smoothly.
In order to remedy this, I moved some of the frames around to prevent the back-most back leg from moving so unnaturally.
First, I tried moving the 2nd frame so that it occurred just before the last frame. Then, I tested out the new frame order by playing them as an animation. The resulting GIF is below.
There still seemed to be an issue with the animation looping smoothly so I decided to look at the frame order again. I decided to try repeating the first frame twice after the last frame occurs as I thought the issue might be that the animation doesn’t show the deer standing still clearly enough. Then, I tested out the new frame order by playing them as an animation. The resulting GIF is shown below.
The new frame order seems to have solved the issue as the animation now loops fine – it showcases the deer executing one walk cycle before stopping, and then beginning to walk again. I decided to move on and draw out the final frames before trying to make a continuous walk loop. For now, I was satisfied with being able to create a smooth transition between the deer walking and the deer stopping in case the game wanted one. Doing so also helped me make sure that the frames I had drawn out so far were capable of making a walk loop.
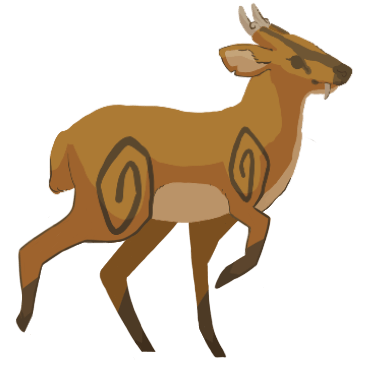
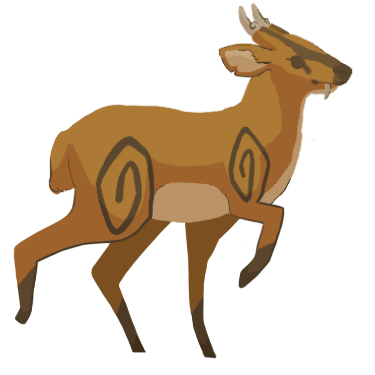
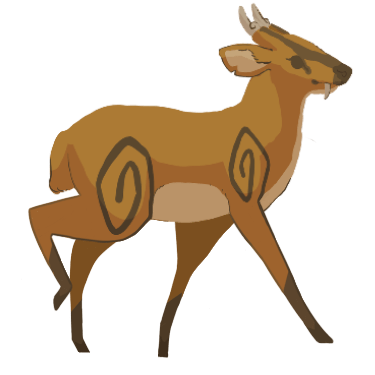
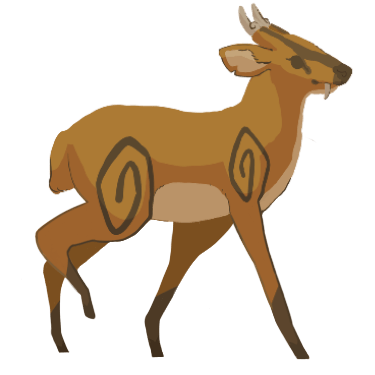
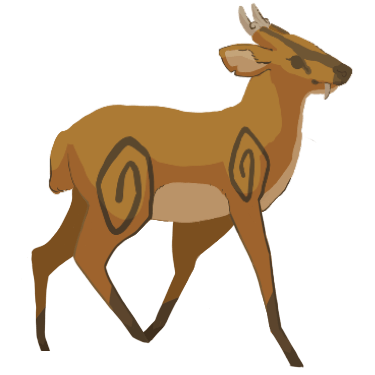
Drawing the Coloured Frames
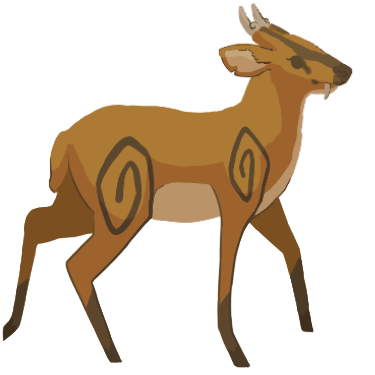
I decided to use the image from Shannon’s blog of the deer standing as the first frame. I had to shrink it down first as its original resolution was too large – I used the outline I had drawn for the first frame as a guide.
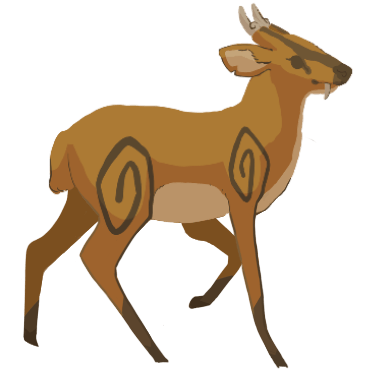
Next, I duplicated the first frame and used it as a basis for the second frame. I also continued using the outlines I had drawn as a guide when altering the duplicated first frame so that it matched the second frame’s outline. When I had finished drawing the second frame, I duplicated it so that I could use it as a basis for the third frame. I continued this process until I was done drawing out all the frames.
During the process, I found that in certain frames, the two back legs seem to stay on the ground for too long – this made the deer look as if they were dragging their back legs instead of lifting them up. I remedied this issue by altering certain frames so that the back legs gradually became higher off the ground instead of staying on the ground/at the same height.
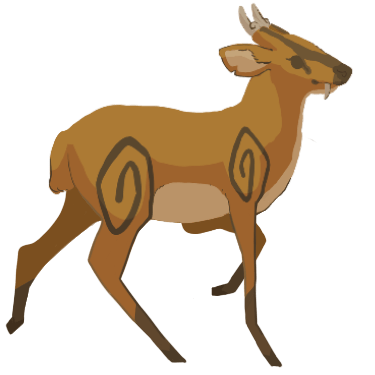
Shown below are the new frames in their animation order and the resulting GIF.
When I looked more closely at the animation, I noticed that the tail was being covered by the back-most back leg. This shouldn’t be occurring since the back-most back leg should be behind the tail – not covering it. I decided to redraw the tail in certain frames so that it covers the leg. Shown below are the altered frames.
Another issue I found with the new animation was that the back-most back leg seemed to move in a peculiar way – it would bend forwards, then bend backwards in the next frame. I resolved this issue by redrawing the leg in the 15th frame (shown above on the left) so that it would only slightly bend forward to make for a smoother transition into the 16th frame. Shown below is the altered frame.
After replacing the 15th frame with the newly altered one, I played the frames as an animation again but found that the back-most back leg still moved strangely. I decided that the issue might be the direction the leg is bent in so I changed it by making the leg slightly backwards. Shown below is the altered frame.
After replacing the 15th frame with the new one, I played the frames as an animation once again and found that the back leg moved more smoothly now. Shown below is the GIF.
However, I had discovered another issue with the animation now that the tail and back leg weren’t distracting me. I found that the belly moved unnaturally throughout the animation due to the frontier front leg’s movements. In order to remedy this issue, I decided to alter all the frames so that the belly didn’t move. I used the first frame’s belly as a guide and changed all the other frames’ bellies so that they matched the first frame’s.
Shown below are the new frames and the resulting GIF.
I found no issues with the new animation. Thus, I moved onto trying to create a more continuous walk loop by making the walk cycle occur for a longer amount of time before the deer stops. In order to achieve this, I played around with the order of the frames to try and make the walk cycle repeat thrice before stopping – thrice seemed like a good number for extending the deer’s walk time.
First, I removed the last frame and replaced it with a duplicate of the 2nd frame. Then, I duplicated frames 3-15 and placed them after the duplicated 2nd frame. Now, I had looped the walk cycle twice.
Next, I repeated frames 2-15. Now, I had looped the walk cycle thrice.
Finally, I placed the original last frame/frame 16 next and repeated the first frame twice. Shown below are the animation frames in this new order and the resulting GIF.
After presenting both the GIF showcasing one walk cycle and the GIF showcasing the walk cycle repeated thrice, I was complimented on them by the team. Bernardo then asked me to send the GIFs again but with transparent backgrounds. He also later asked me to create a walk loop that looped continuously without the deer stopping.
In regards to making the GIFs transparent, I went into Krita to try and make the GIFs transparent by making the white background invisible. However, when I rendered the animations, there was a red line that outlined in both GIFs. These red outlines only appeared in the rendered transparent GIFs – they didn’t appear in the non-transparent GIFs or the non-rendered animations in-program. They also didn’t appear when I rendered the transparent GIFs as videos, which I decided to try in order to test if the red outline also affected video-renders.
In order to try resolving this issue, I decide to try researching the internet for possible solutions but I couldn’t find any mentions of the issue. Thus, I tried searching for other free programs that could render GIFs but couldn’t find any. I then moved onto searching for websites that could render images as GIFs for free.
Using this website, I succeeded in making the walking GIFs transparent. Firstly, I saved all the frames as transparent PNGs. Then, I uploaded them to the website and saved them as transparent GIFs.
Shown below are the transparent GIFs.
After finding a method of rendering transparent GIFs, I moved onto creating a continuous walk loop out of the animation frames by creating a new sequence out of them.
First, I removed the first frame. Then, I removed the last frame. This meant that only the original 14 frames I had created using the screenshots as reference remained. I knew these frames could loop continuously as I had experimented with them before. Shown below are the frames in their animation sequence order and the resulting GIF.
Finally, I used the website to render the frames as a transparent GIF. Shown below is the transparent GIF.
After sending the walk loop as a transparent GIF into Slack, it was well-received by Bernardo. However, later that day Bernardo told me that there was an issue with the GIF’s quality. It appears that the website had compressed the images during the rendering process.
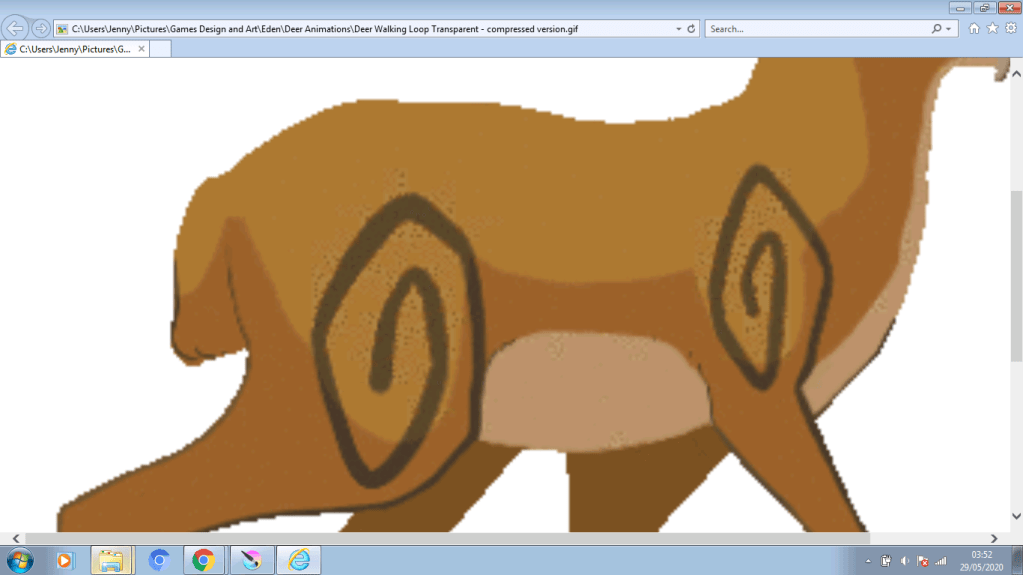
I checked the GIF’s quality myself by zooming in on it. I found that the quality was poor due to the website as I found no such issue with the GIFs I had rendered in Krita. Thus, we had a new issue to deal with. Eventually, I decided to solve the issue by sending the frames as transparent PNGs in Slack for the other team members to try rendering if they had a suitable program. However, Bernardo told me that he could just load the frames himself. Therefore, the problem was solved.
Animating the Deer Talking
Before drawing anything I had to decide the canvas resolution as there was no determined resolution for the deer’s talking animation. Eventually, I made the canvas 1280 x 1280. I decided to make the resolution fairly large so that it could easily be scaled down if needed. Scaling it up would be a more difficult task, which is why I chose a reasonably large resolution.
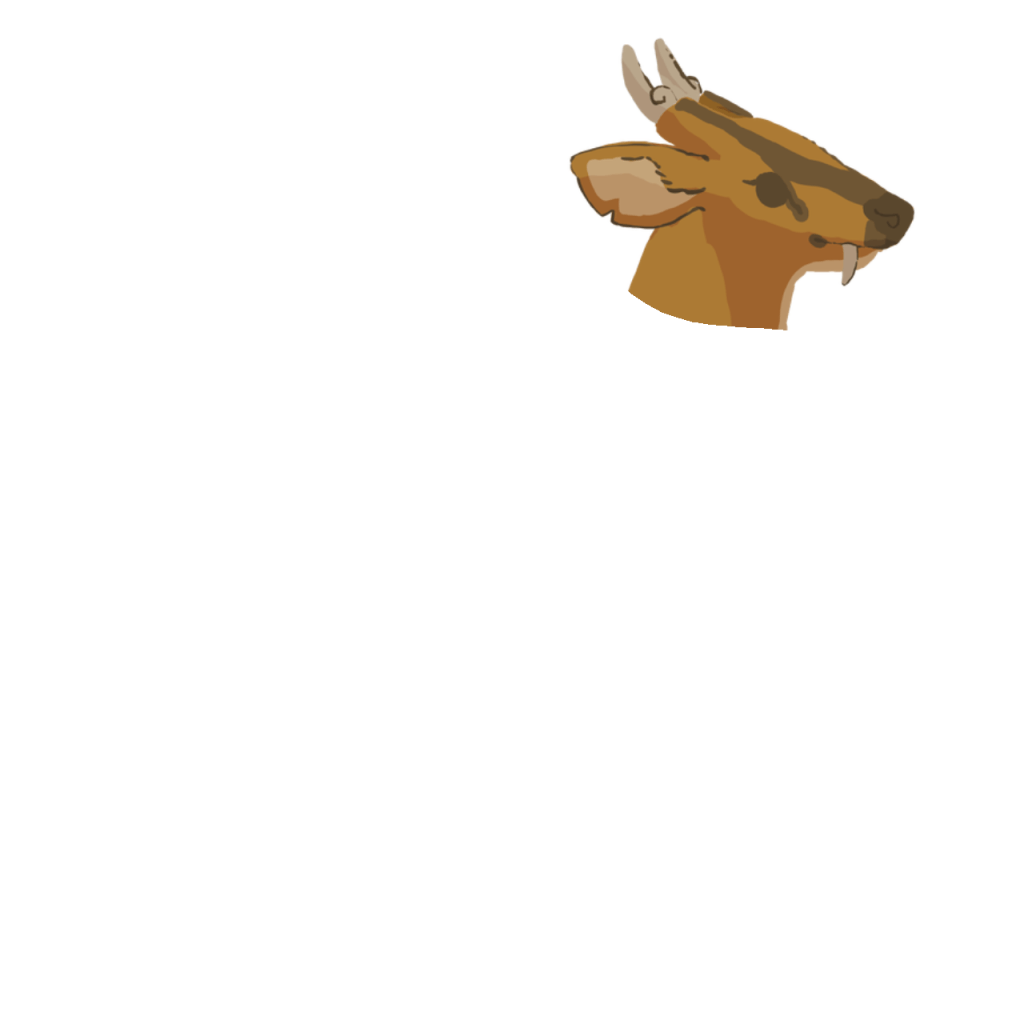
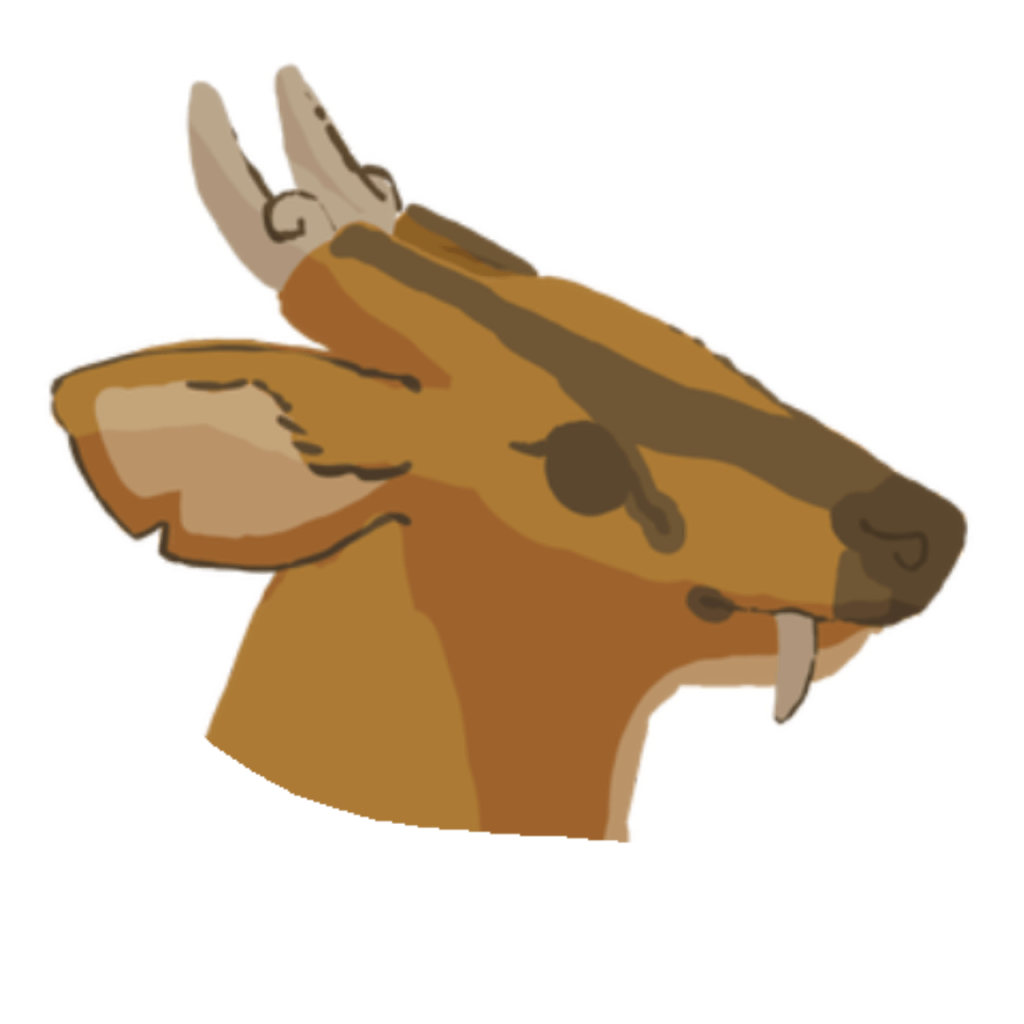
Firstly, I used the image of the deer standing from Shannon’s blog as a starting foundation.
Next, I used the lasso tool to select the deer’s head. Then, I copy-and-pasted the head onto a new layer. I also made the original layer invisible.
Next, I enlarged the head so that it filled more of the canvas.
Then, I altered the head so that it appeared to face upwards and further ahead as opposed to the side.
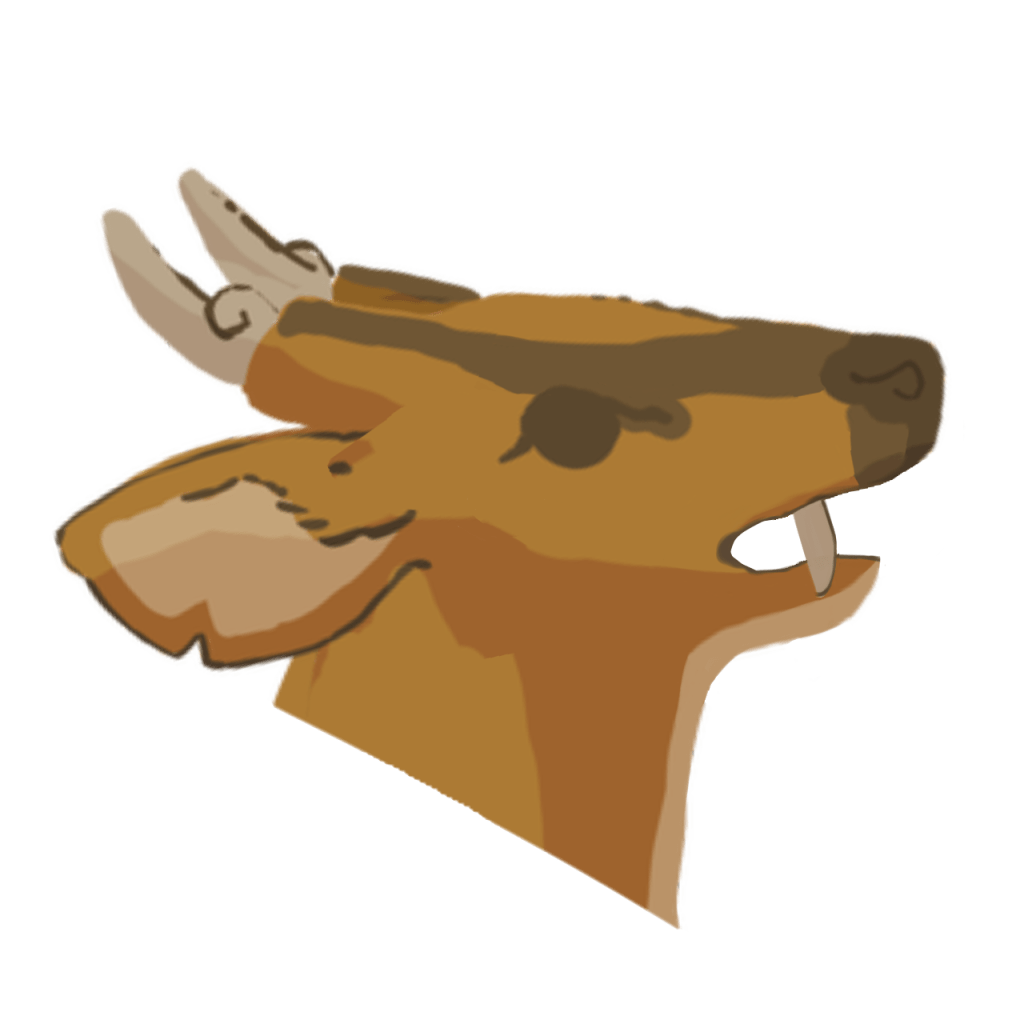
Now, I had my first animation frame. I then proceeded to create the second frame. I began by duplicating the first frame so that it could be used as a basis. Next, I altered the frame so that the mouth opened slightly.
I decided to test out the frames by playing them as an animation. I changed the fps until I was satisfied with the speed. I ended up choosing a speed of 9 fps. Shown below is the animation as a GIF.
After observing the animation, I realised that there was an issue with the neck’s movement. The neck appeared to move strangely. I decided to scrutinise the frames again to see what had caused this issue. After doing so, I found that the first frame’s neck looked strange – it was slightly jagged at a certain point. I decided to fix this issue by redrawing part of the neck. Shown below is the altered frame.
After fixing the first frame, I played them as an animation again to see if there were any further problems. Shown below is the animation GIF.
I found no further issues with the new animation so I proceeded to try rendering the GIF transparent in Krita. However, I encountered a peculiar issue after rendering the transparent GIF. The first frame refused to disappear throughout the animation. Shown below is the GIF.
This issue didn’t occur when I played the animation in-program so I was at a struggle as to finding out why this issue was occurring. I tried rendering the GIF on the website and encountered the same issue. I concluded that the issue laid in the frames themselves rather than the software rendering them. Therefore, I tried loading the second frame in a separate canvas and saving it as a transparent PNG before replacing the old frame with the new one. I then proceeded to try rendering the animation as a transparent GIF again on the website. It ended up working. I zoomed into the GIF to ensure that there were no problems with the quality of the GIF and found none. I concluded that perhaps it was due to the low resolution of the walking frames that caused the website to compress them.
Shown below is the deer talking transparent GIF.
Finally, I sent the GIF in Slack and it was well-received.
During my research into Anna Lepeshkina, I found a video of her showcasing a trailer for the ‘personal game project’ she had created the ‘mushroom forest’ concept artworks for.
After some further research, I also found a behind-the-scenes video showcasing the animation program she had used in her game.
Fat witch animation timelapse (Spine 2d)
The program is called ‘Spine 2D‘. Spine 2D is a program that animates 2D assets in a way that makes them appear 3D – the animations make them look ‘floaty’. We had a brief discussion about it in an early team meeting and decided that the ‘floaty’ animation style wouldn’t suit Eden as it lacked a clear, crisp quality.
Afterwards, we discussed ideas for alternative free animation programs. Some programs that were mentioned include Krita and OpenToonz. Since Krita had a limit of 100 frames, we decided to look into OpenToonz as none of us had used it before.
After researching OpenToonz, I found out that “the software [was] used to create Studio Ghibli films like Spirited Away and TV shows like Steven Universe and Futurama” (Allen, 2016). This meant that the program could produce quality animations and was industry-standard. OpenToonz is also a free software to download and use. Therefore, it was deemed a suitable program to use for producing the game.
In order to test out the program myself, I decided to download OpenToonz and research for a tutorial on how to use the software. I found a short beginner’s tutorial on YouTube that I ended up using as a guide for using the program.
Using the video as guidance, I created tried creating a short, rough animation of the deer walking in order to familiarise myself with the program and see how easy it is to use. I found that the program was fairly simple to use but it did consist of many menu options that I would need time to get used to.
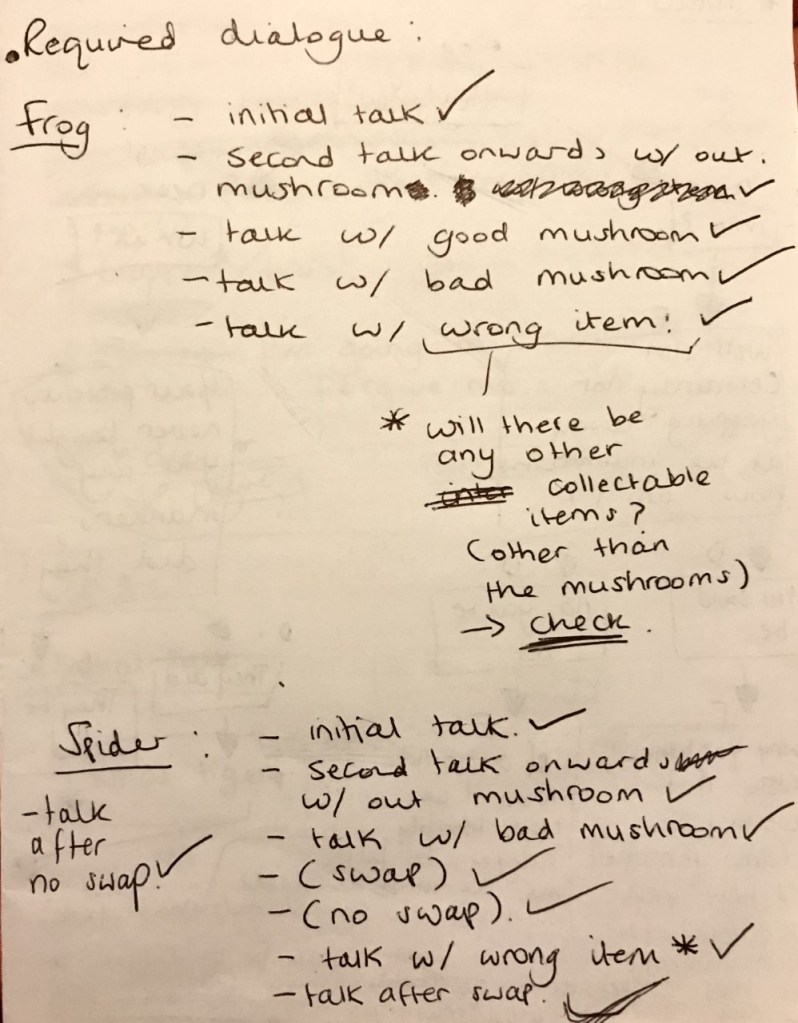
Before making the new dialogue for the new project scope, which was discussed in Team Meeting 10, I made a list of what dialogue I needed to create.
Next, I went through each dialogue on the list and wrote what each needed to imply before creating the dialogue.
FROG
Frog initial talk – Things the dialogue needs to do: needs to give the player the mushroom quest needs to give the frog’s reason for wanting the mushroom needs to showcase the frog’s bad personality needs to offer the player help getting to the ledge
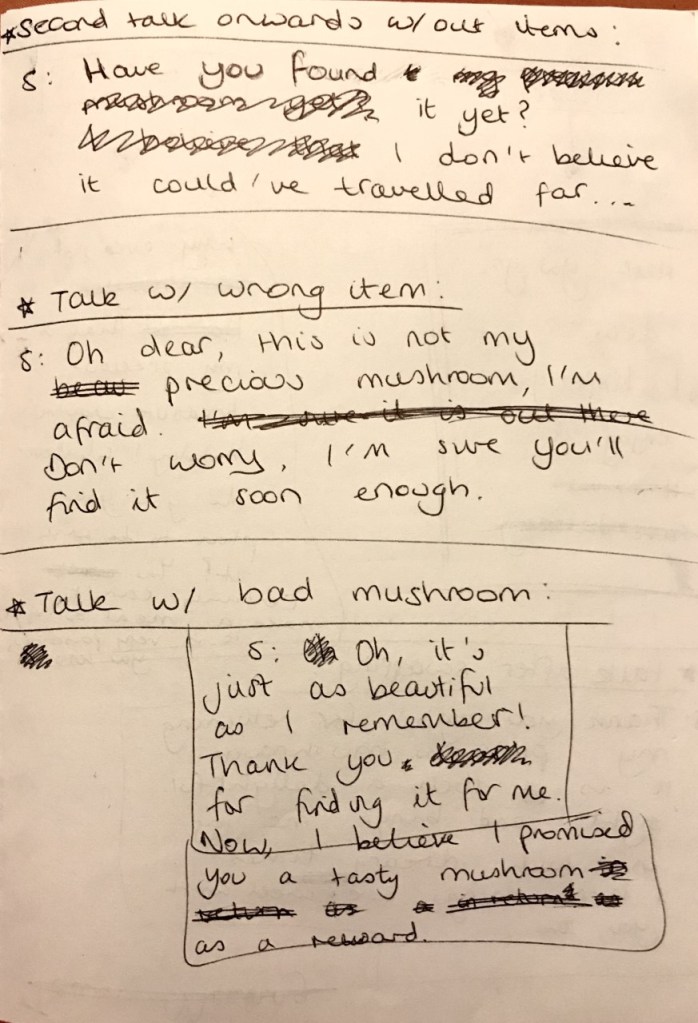
Frog second talk onward without being given items – Things the dialogue needs to do: needs to showcase the frog’s bad personality
Frog if given wrong item – Things the dialogue needs to do: needs to showcase the frog’s bad personality
Frog when given good mushroom – Things the dialogue needs to do: needs to showcase the frog having a change of personality needs to showcase the frog treating the player nicely needs to showcase the frog displaying awe at the player
Frog when given poisonous mushroom – Things the dialogue needs to do: needs to showcase the frog realising the mushroom is poisonous needs to showcase the frog dying needs to invoke some sympathy/regret in the player
SPIDER
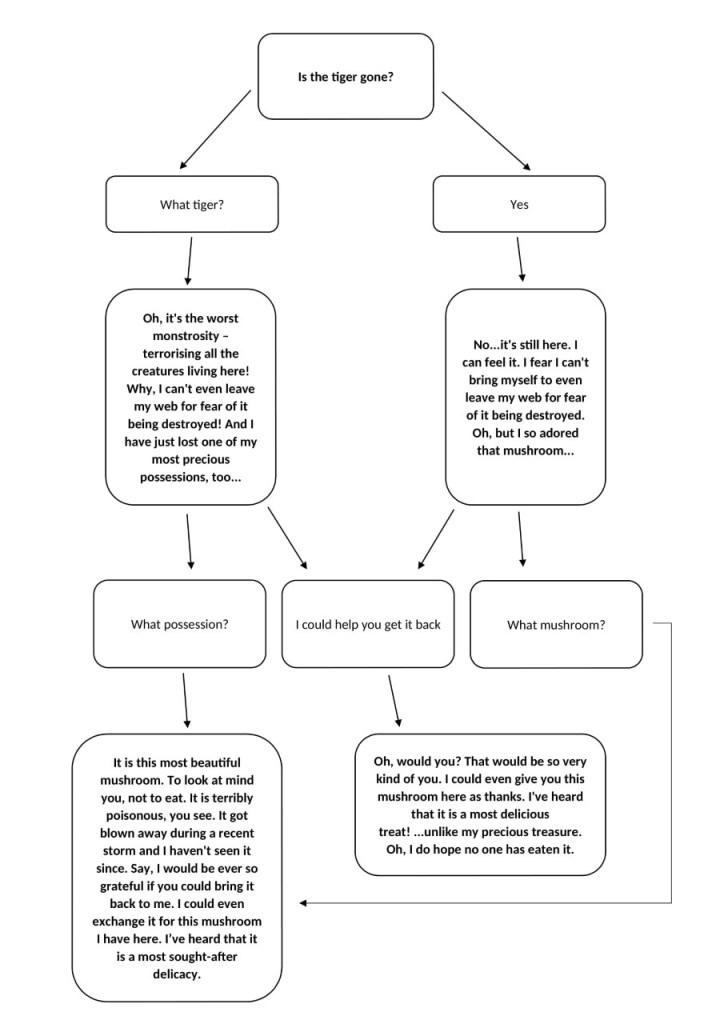
Spider initial talk – Things the dialogue needs to do: needs to showcase the spider’s gentle personality needs to give the sakura/flower quest needs to showcase the reason for the sakura/flower quest needs to mention the tiger
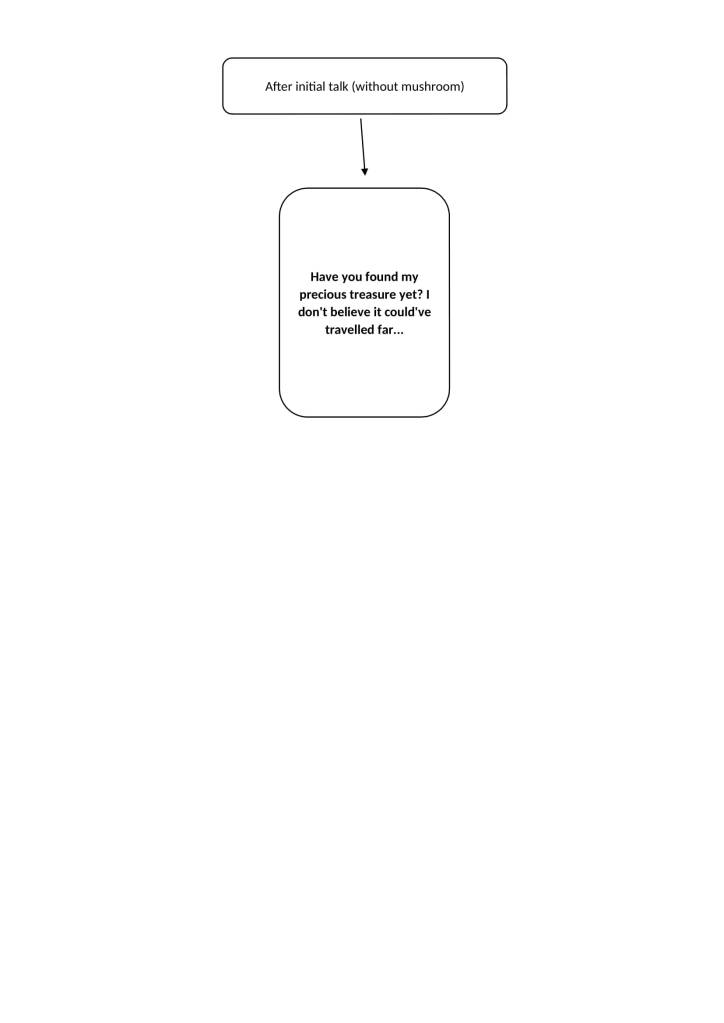
Spider when given the wrong item – Things the dialogue needs to do: needs to give the player a hint towards the right answer
Spider when given the poisonous mushroom – Things the dialogue needs to do: needs to have the spider offer to give the player the good mushroom needs to have the spider show gratitude
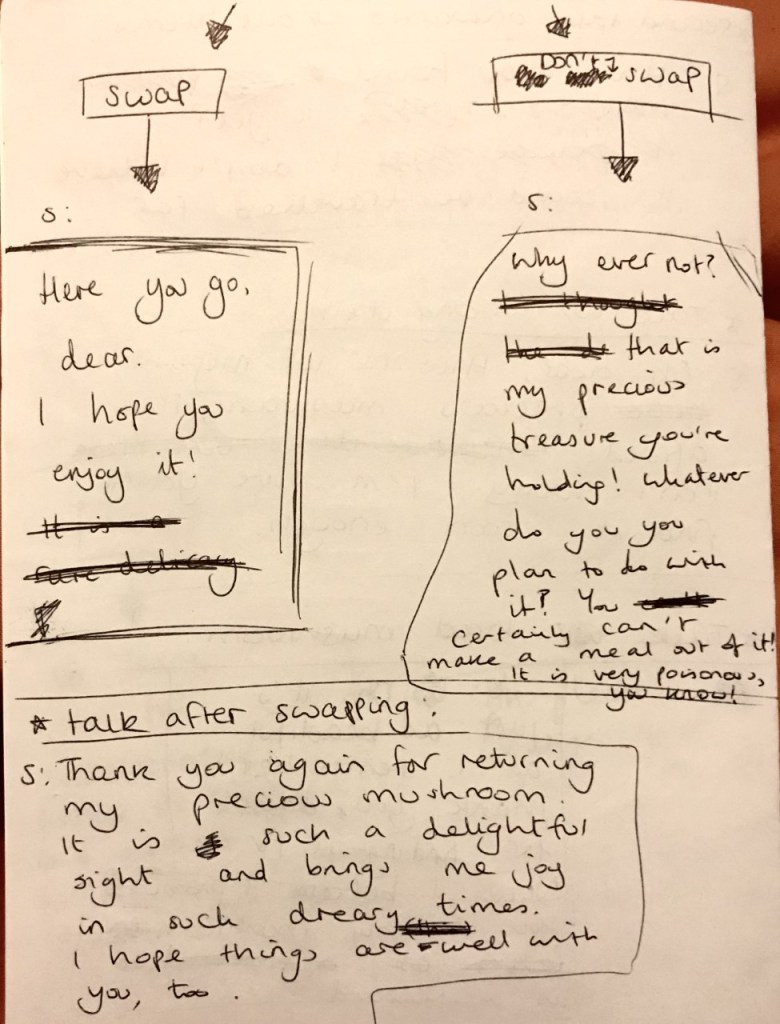
Spider when the player chooses to swap mushrooms – Things the dialogue needs to do: needs to have the spider show gratitude needs to have the spider give the player the good mushroom
Spider when the player chooses to not swap mushrooms – Things the dialogue needs to do: needs to have the spider show sadness needs to have the spider plead for the poisonous mushroom
Spider after player chooses to swap – Things the dialogue needs to do: needs to have the spider show happiness
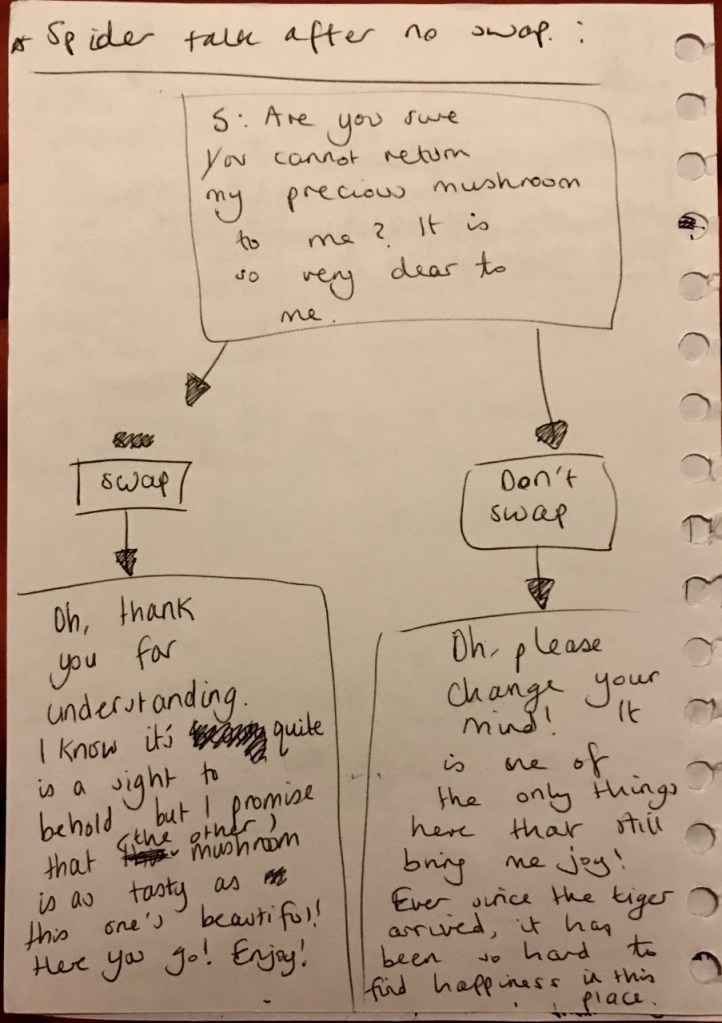
Spider after player chooses to not swap – Things the dialogue needs to do: needs to have the spider show sadness needs to have the spider plead for the poisonous mushroom
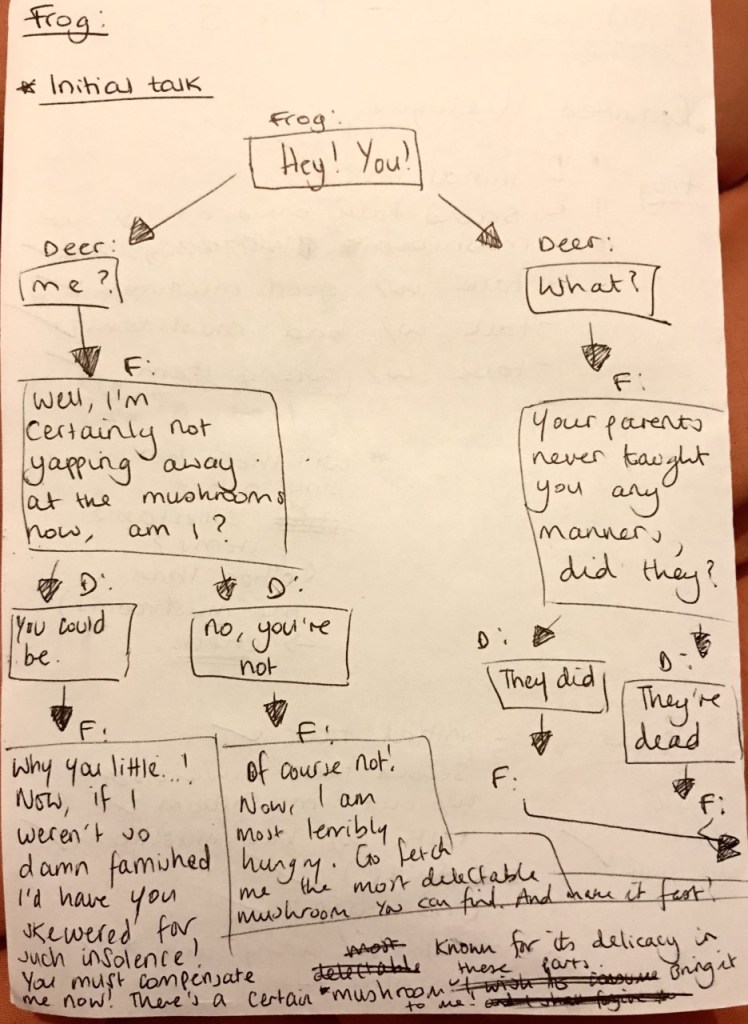
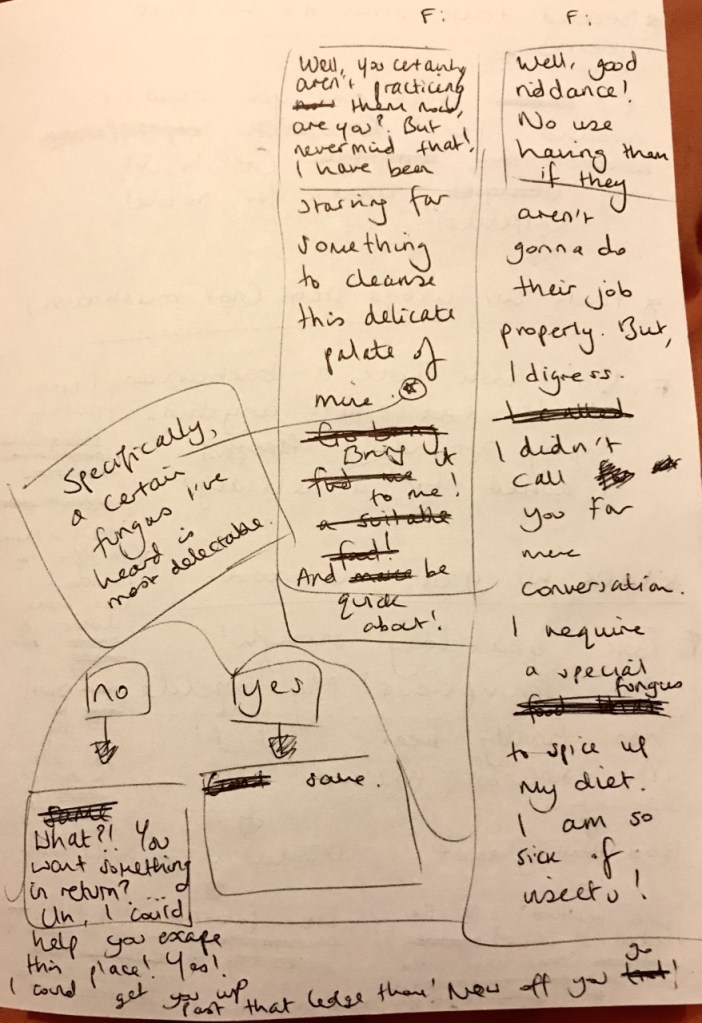
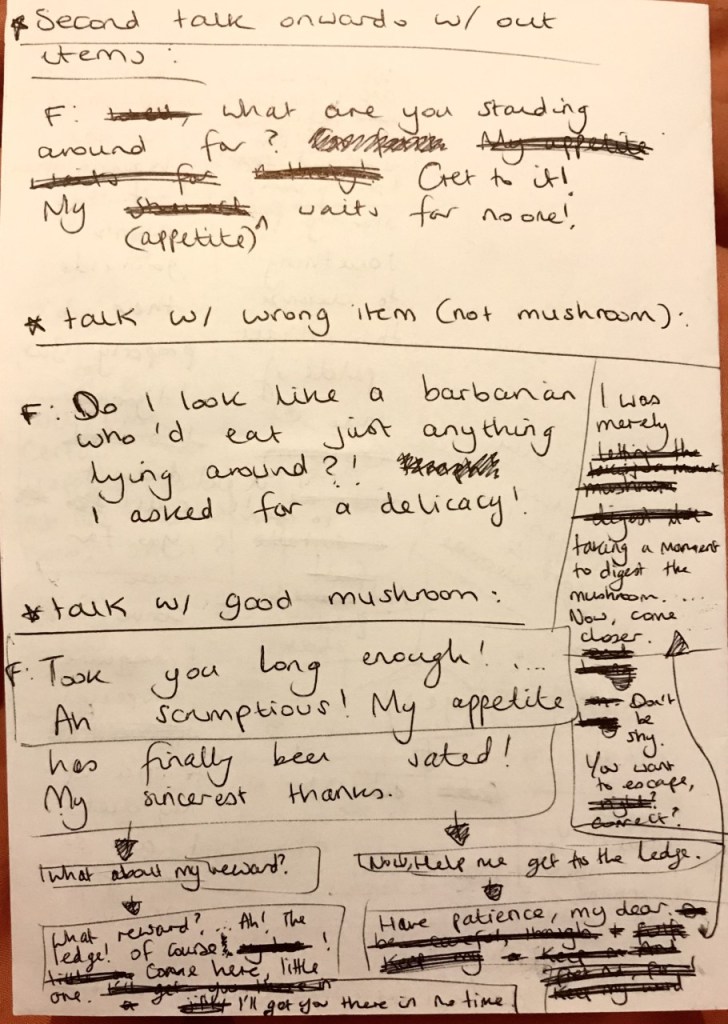
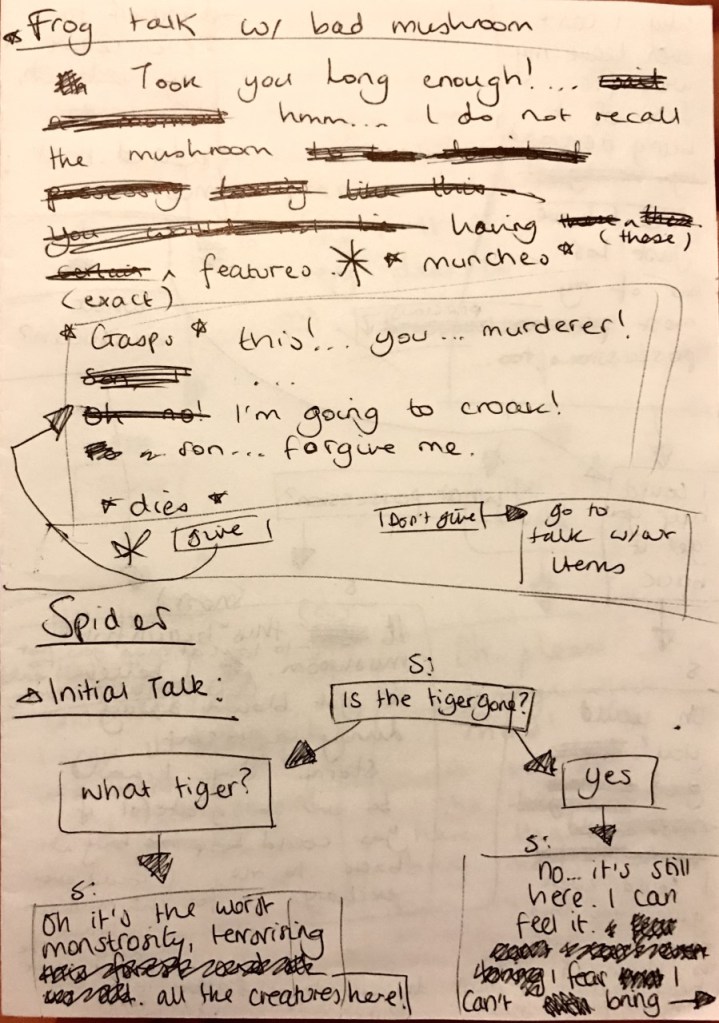
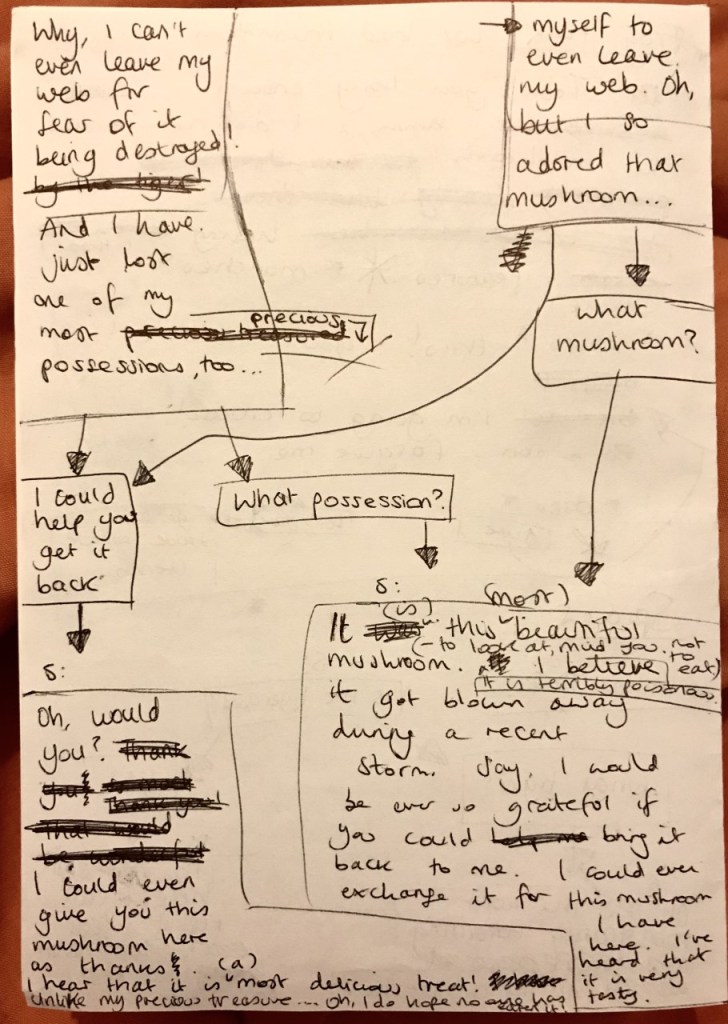
Shown below are the rough drafts of the new dialogue.
After drafting out the new dialogue, I digitised the dialogue in flowchart form using Word to make it easier to read.
I was tasked with altering the existing dialogue to make it suits the new project scope, which was discussing in Team Meeting 6.
Firstly, I made a list of what dialogue I would retain and what dialogue needed changing or adding.
Dialogue
FROG Frog at beginning – keep Frog when given wrong item in flies quest – keep Frog when flies quest is complete – change Frog when given wrong item in mushroom quest – add Frog when given poisonous mushroom – add Frog when given correct mushroom – keep
SPIDER Spider at first – keep Spider when given wrong item – change Spider when given right thing – keep
After noting down what dialogue needed changing or adding, I began creating/changing the dialogue. I decided to list the things the new dialogue needed to imply.
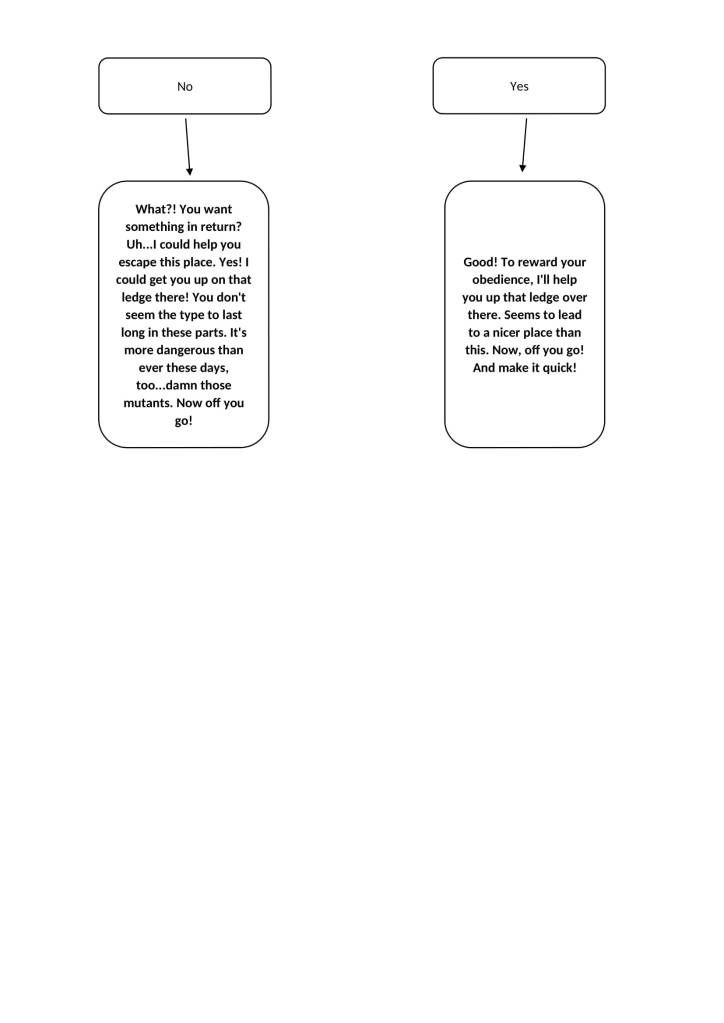
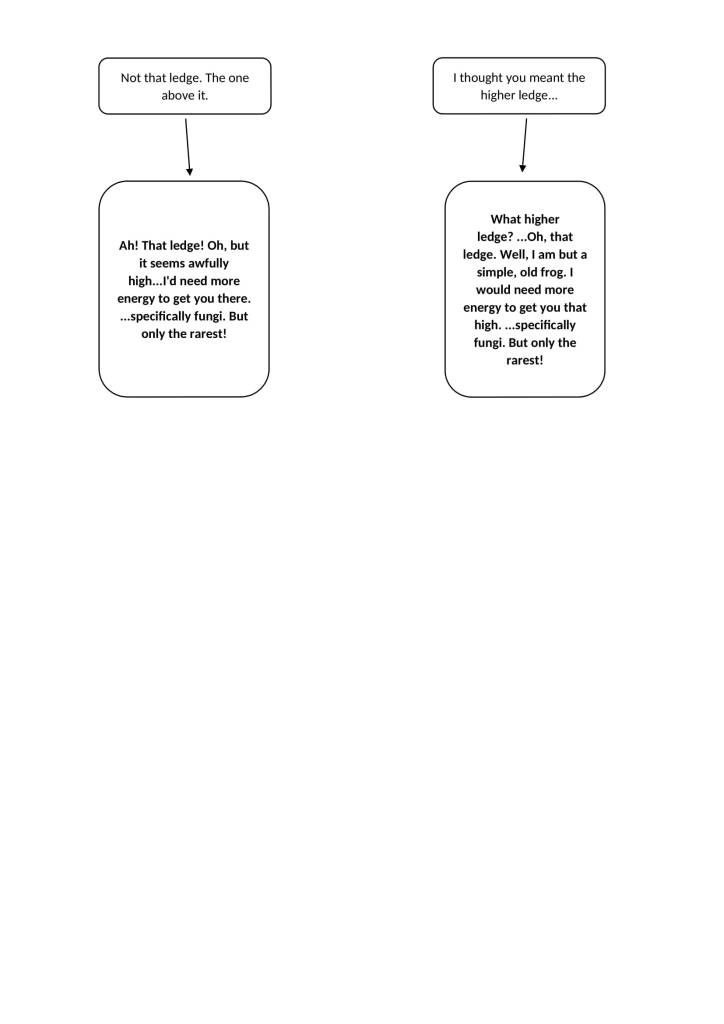
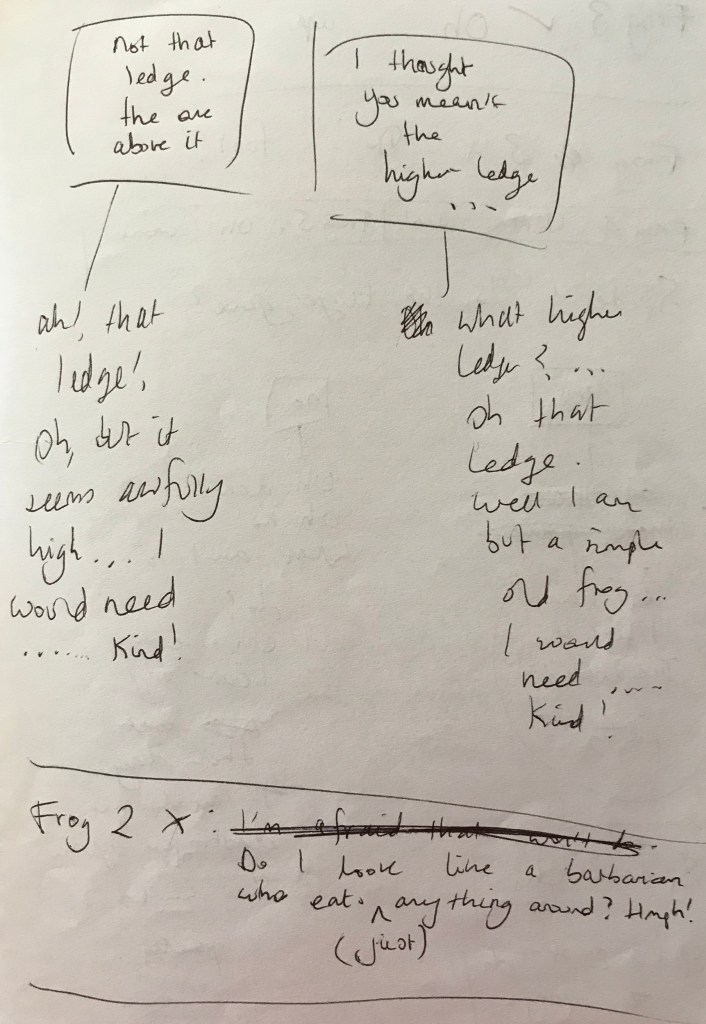
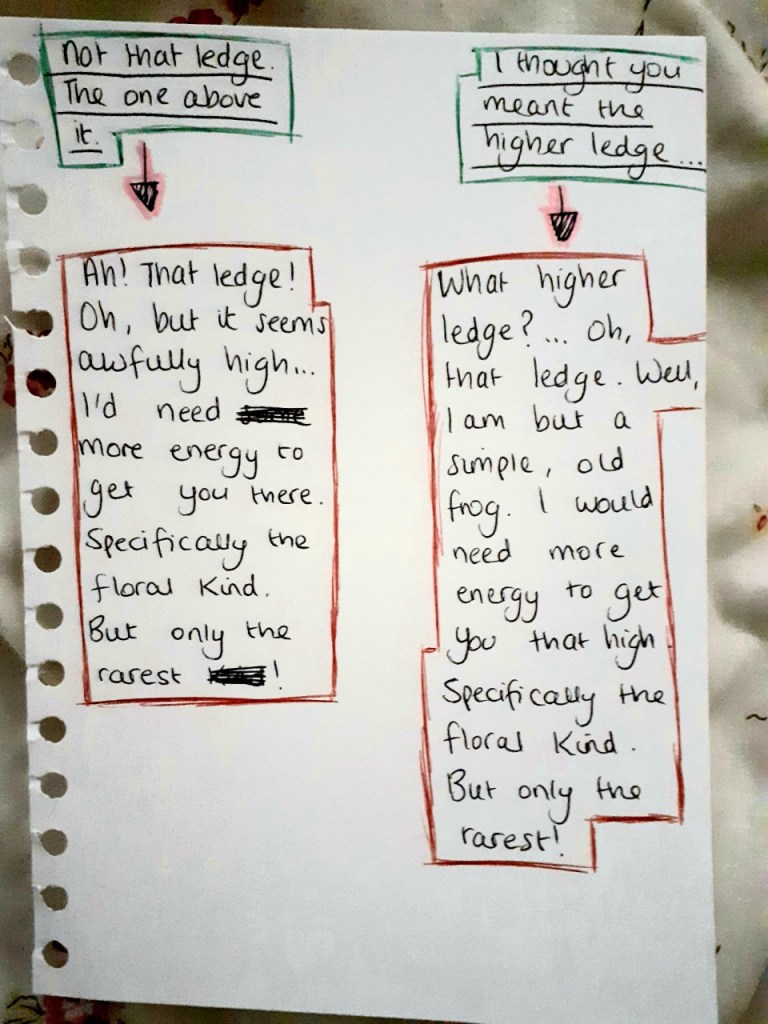
Frog when flies quest is complete – Things the dialogue needs to do: needs to have the frog give the mushroom quest needs to give the reason for the mushroom quest needs to have the frog pretend to not know the player meant the lower ledge needs to showcase the frog offering to help the player to the lower ledge needs to showcase the frog offering to help the player to the highest ledge
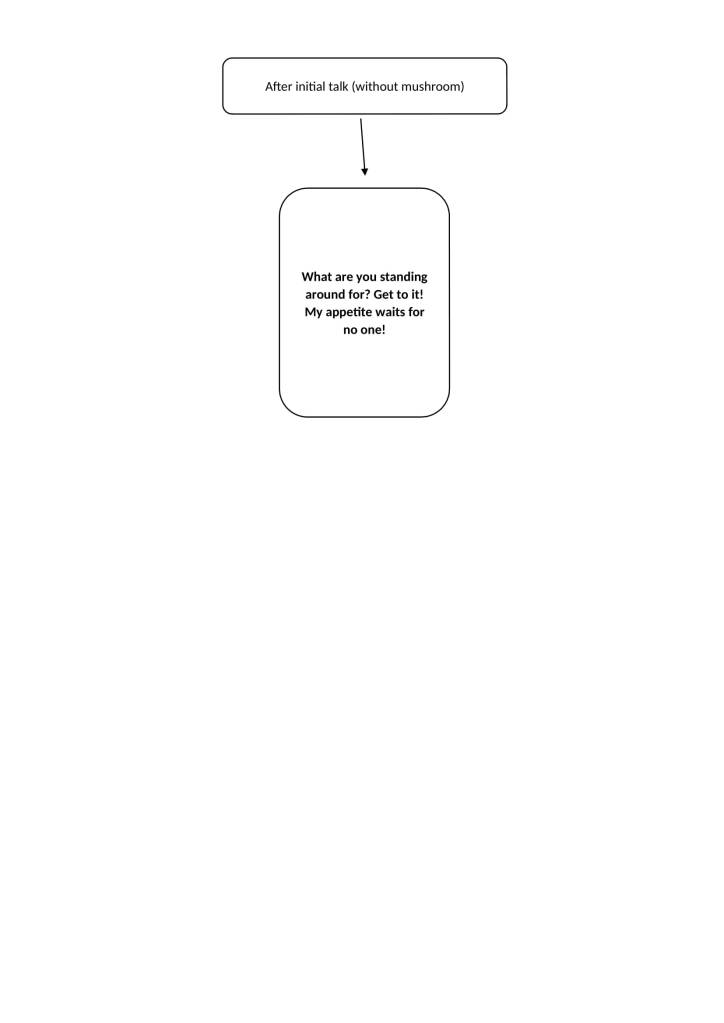
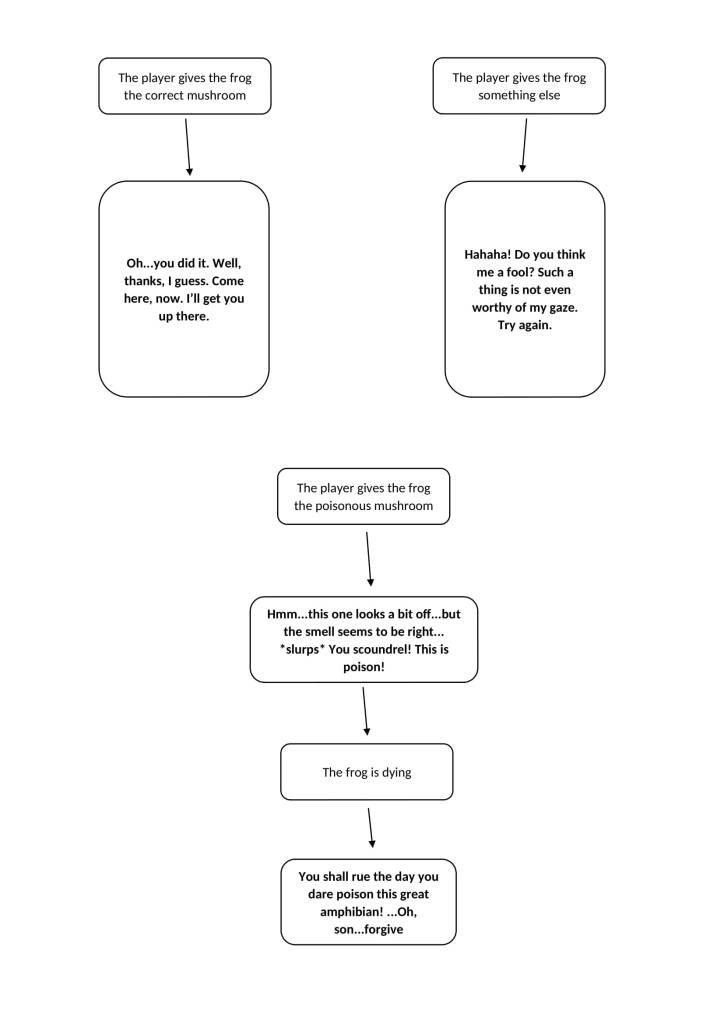
Frog when given wrong item in mushroom quest – Things the dialogue needs to do: needs to showcase the frog’s bad personality
Frog when given poisonous mushroom – Things the dialogue needs to do: needs to showcase the frog realising the mushroom is poisonous needs to showcase the frog dying needs to invoke some sympathy/regret in the player
Spider when given wrong item – Things the dialogue needs to do: needs to give the player a hint towards the right answer
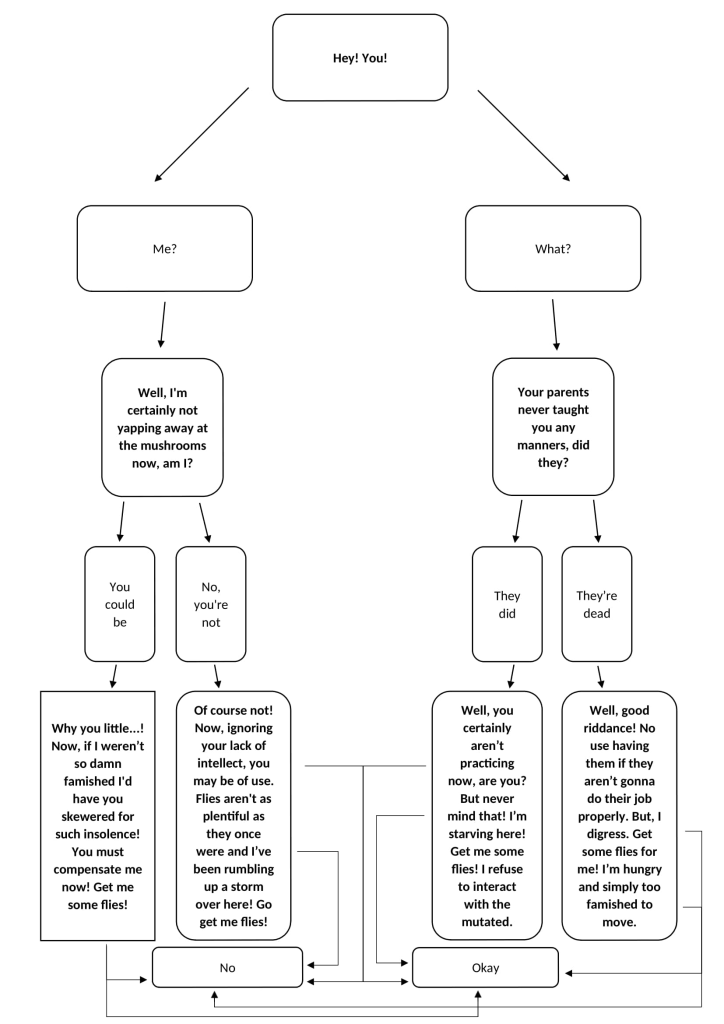
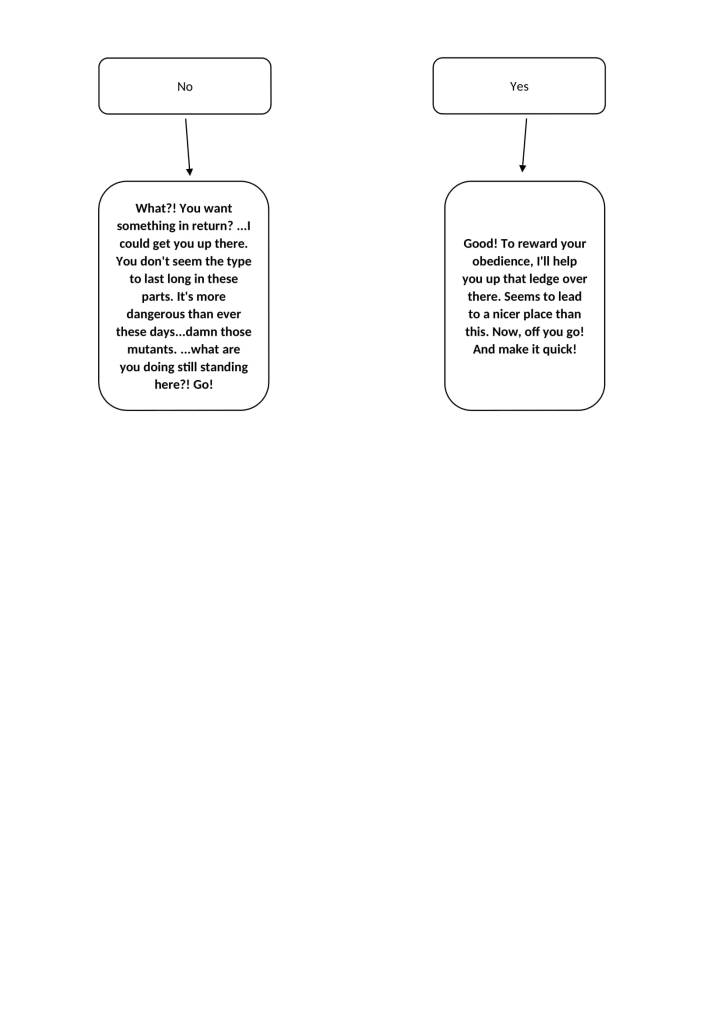
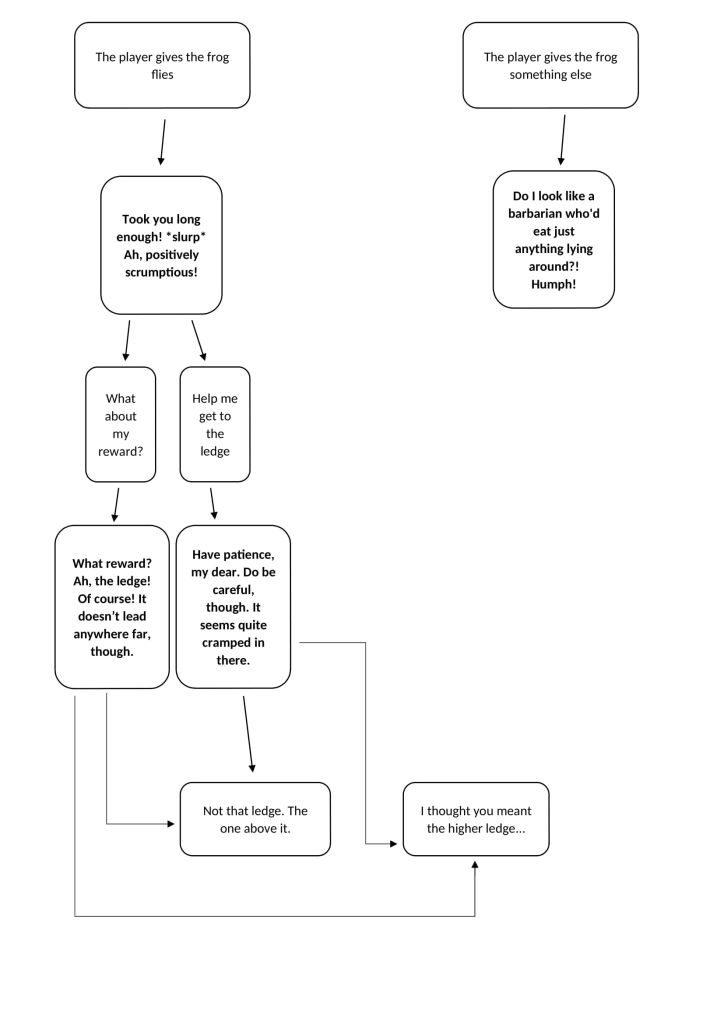
After listing what each new dialogue needed to accomplish, I began creating the dialogue whilst keeping the list in mind. When I finished creating the dialogue, I decided to make it easier to read by digitising it.
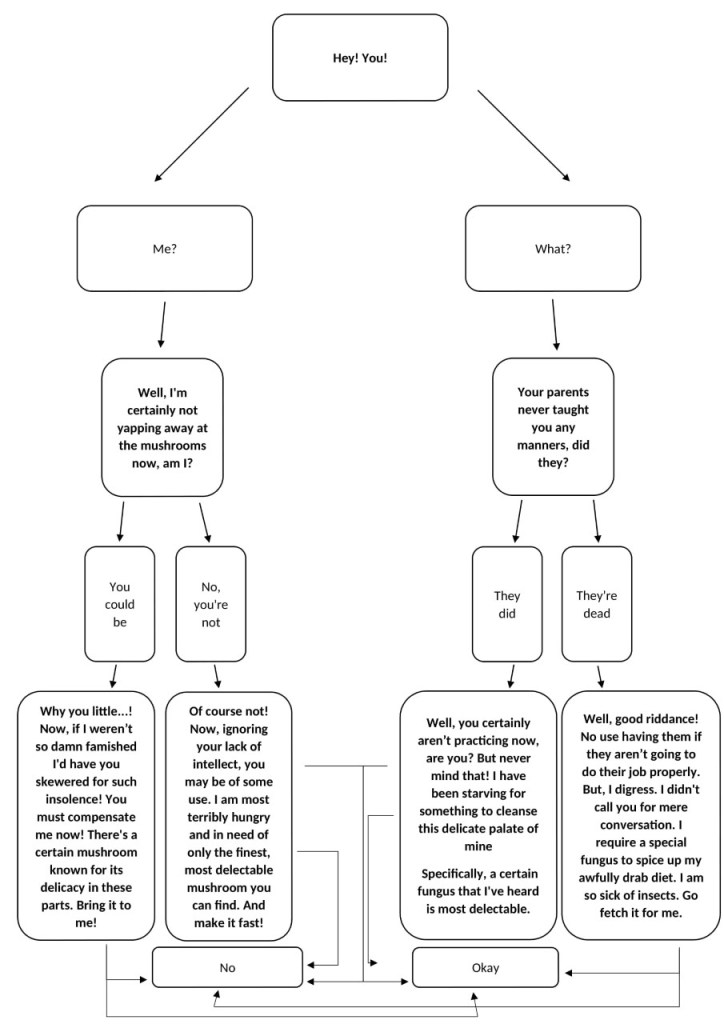
Shown below is the new dialogue in digital flowchart format. I used Word to create the flowcharts.
We first discussed dialogue ideas in Team Meeting 5: Part One, in which a rough outline of the dialogue was decided on. We first began by listing the different dialogue we needed for the different scenarios. This was done to ensure that we were thorough in our dialogue-creating and didn’t miss any necessary dialogue out. Next, we began discussing the dialogue for each listed scenario, starting with the frog’s dialogue.
We also discussed what each piece of dialogue should imply to ensure that certain narrative aspects were covered in the dialogue.
Shown below is the dialogue we created in the meeting.
FROG
Frog dialogue at the start – Things the dialogue needs to do: needs to give the player the flies quest needs to give the frog’s reason for wanting the flies needs to showcase the frog’s bad personality needs to offer the player help getting to the ledge Dialogue: “Hey! You! I’m hungry over here! Get me some flies! … What? You want something for that? *turns around* I can help you get up there.”
Frog dialogue if player gives wrong item during flies quest – Things the dialogue needs to do: needs to showcase the frog’s bad personality Dialogue: “Do I look like a barbarian who eats just anything lying around?! Humph!”
Frog dialogue if player gives them flies – Things the dialogue needs to do: needs to showcase the bad personality needs to offer the player help getting to the lower ledge needs to have the frog pretend to not know that the player wanted help getting to highest ledge needs to offer to help the player get to the highest ledge needs to give the plants quest needs to give the reason for the plants quest Dialogue: “Took you long enough.” *slurps* “Oh, you wanted to go up there! Oh, well, I’d need more energy to get up there – specifically the floral kind.”
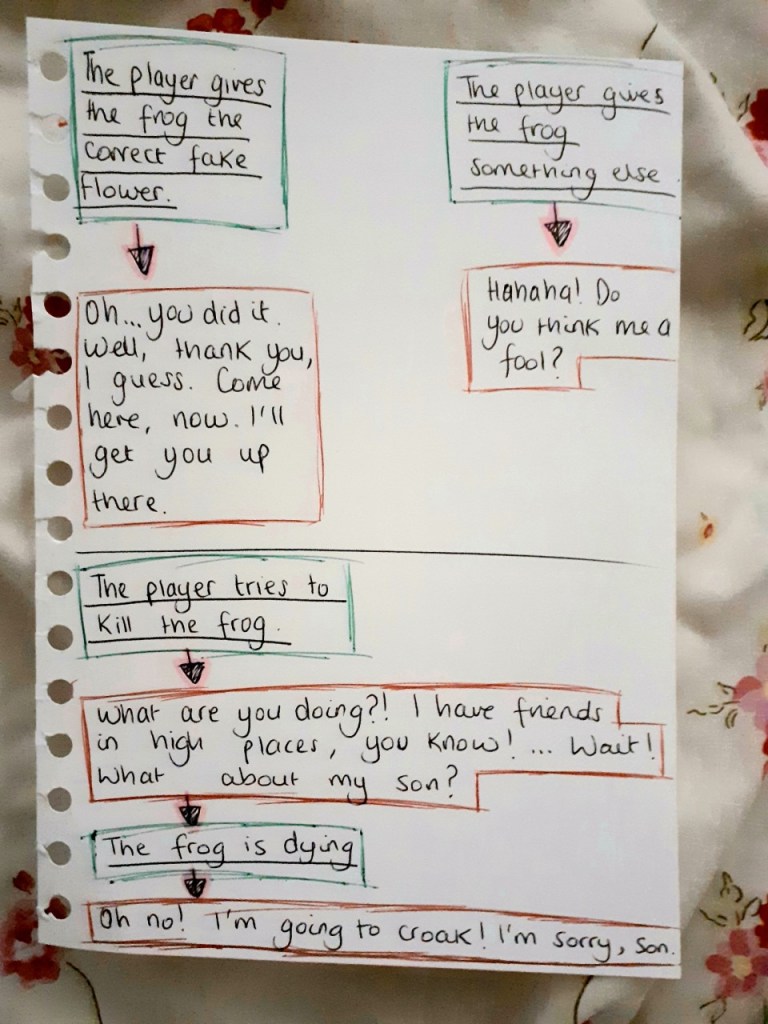
Frog dialogue if player gives wrong item during plant quest – Things the dialogue needs to do: needs to showcase the frog’s bad personality Dialogue: “Hahaha! Do you think me a fool?!”
Frog dialogue if player gives them the correct fake flower – Things the dialogue needs to do: needs to showcase the frog having a change of personality needs to showcase the frog treating the player nicely needs to showcase the frog displaying awe at the player Dialogue: “Oh…you…did it. Well…thank you, I guess. Come here, now. I’ll get you up there.”
Frog dialogue if the player tries to kill them – Things the dialogue needs to do: needs to showcase the frog panicking needs to invoke some sympathy/regret in the player Dialogue: “What are you doing? I have friends in high places, you know! … Wait! What about my son!”
Frog dialogue as they’re dying – Things the dialogue needs to do: needs to showcase the frog dying Dialogue: “Oh no! I’m going to croak!”
SPIDER
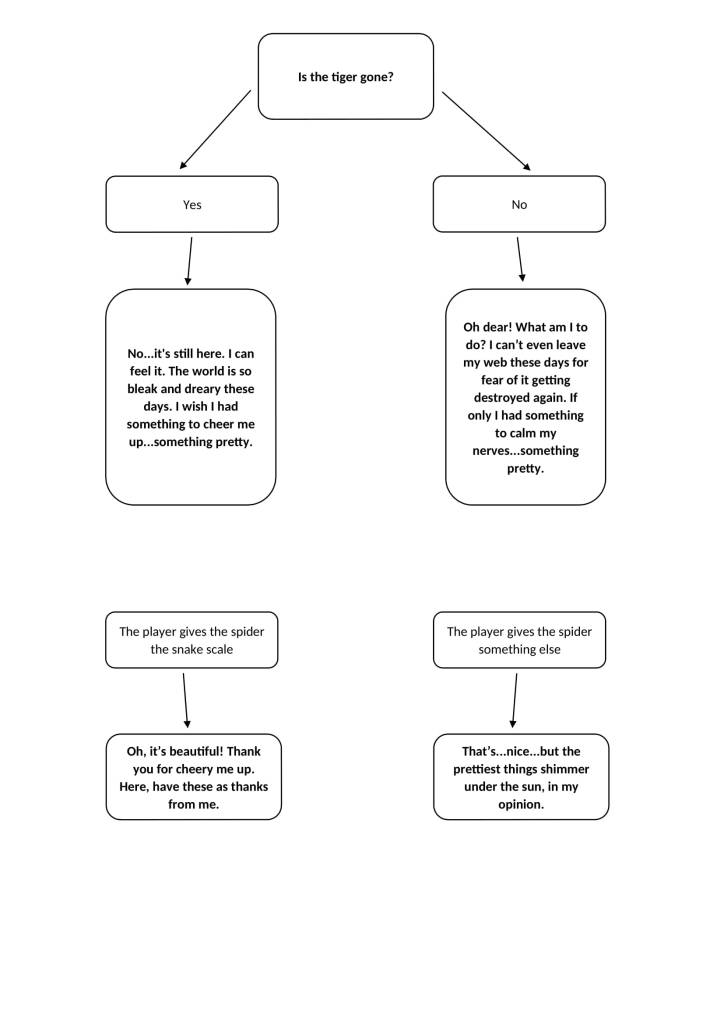
Spider dialogue at the first interaction – Things the dialogue needs to do: needs to showcase the spider’s gentle personality needs to give the sakura/flower quest needs to showcase the reason for the sakura/flower quest needs to mention the tiger Dialogue: “Is the tiger gone? The world is so dark and bleak. I wish I had something to cheer me up. Something pretty…”
Spider dialogue if player gives the wrong item – Things the dialogue needs to do: needs to give the player a hint towards the right answer Dialogue: “That’s nice…but…the prettiest things appear in spring.”
Spider dialogue if player gives them the sakura – Things the dialogue needs to do: needs to have the spider offer to give the player flies needs to have the spider thank the player Dialogue: “Oh! It’s beautiful! Thank you for cheering me up! Here, have these as thanks from me.”
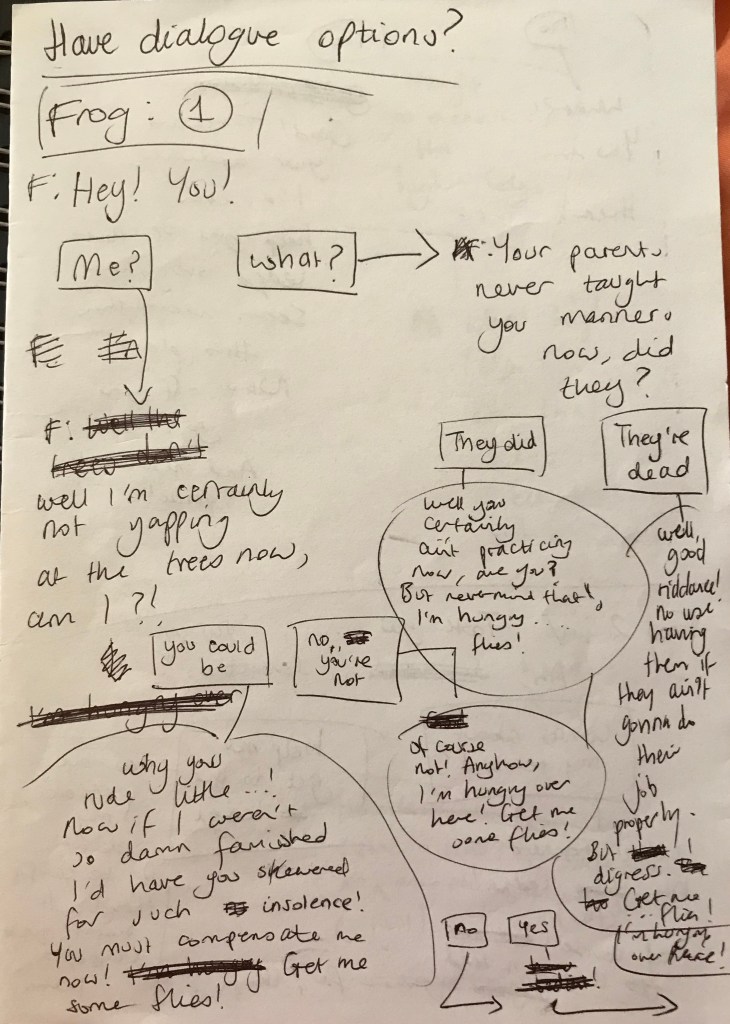
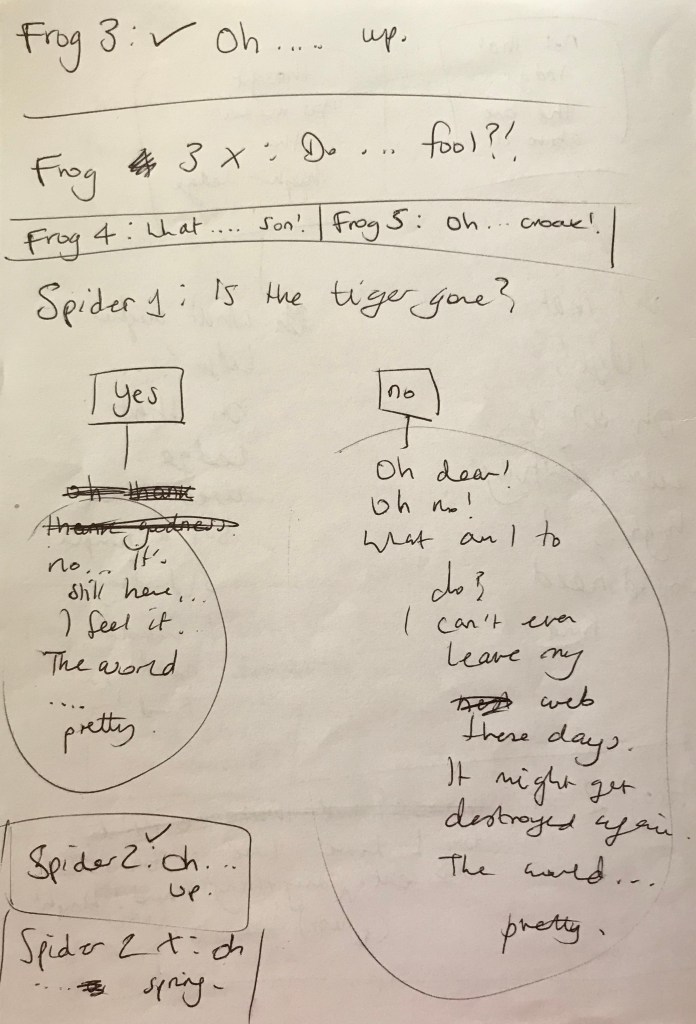
After the meeting, I decided to try adding in dialogue options for the deer whilst using the dialogue above as a basis. I also decided to alter and add bits of dialogue to better imply certain narrative aspects that the original failed to do. For instance, the frog’s background, the reasons behind the quests and the tiger’s presence in the forest.
Shown below are the rough notes from the ideation process. I have places ellipses in places where the dialogue has remained unchanged from the meeting’s dialogue notes.
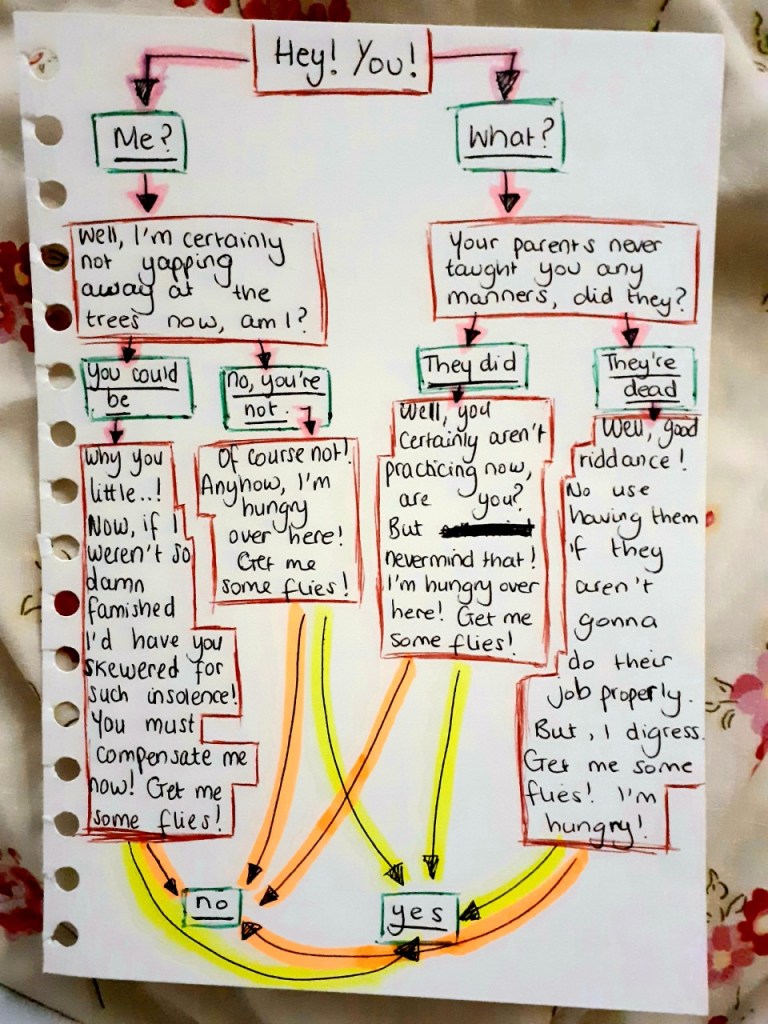
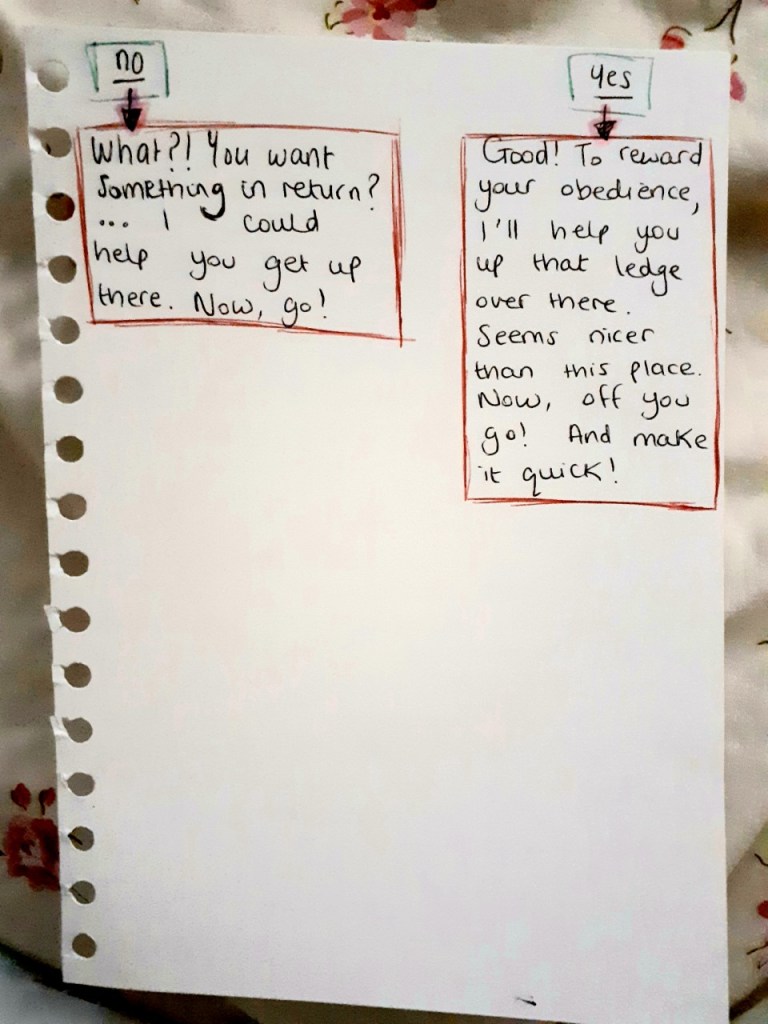
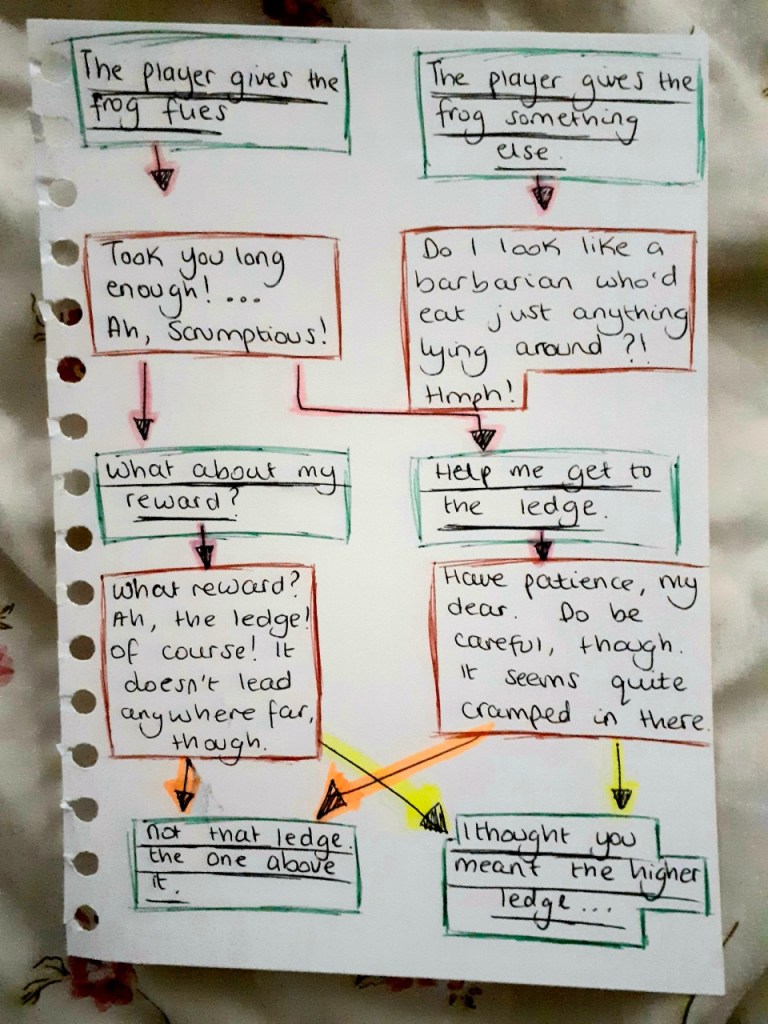
After writing down the new dialogue in a rough format, I decided to rewrite them and colour code them so that it is clear who says what. I also chose to write the dialogue in a flow chart format so that it’s blatant what dialogue certain options lead to.
For the deer, I outlined their speech in green. For the other animals, I outlined their speech in red. Shown below are the final versions of the dialogue.
After deciding the puzzles in Task 2.1 – Puzzles, we moved onto discussing the narrative and how we could integrate elements of storytelling into the puzzles/characters to make for a more cohesive and immersive gaming experience. We wanted the narrative to either be portrayed through environmental storytelling or dialogue since the game since the game didn’t have a narration system.
Furthermore, the game was supposed to be art-heavy as opposed to story-heavy so the narrative had to be light and not too plentiful.
Creating the Narrative
In order to be thorough, we decided to go through each quest individually and add bits of narrative to each one. We picked out some key elements from the quests and discussed how we could add depth to them as a method of creating narrative for the quests. Additionally, we also decided what things we needed explanations for and discussed ways in which we could explain them.
Main Quests
Flies Quest
Firstly, we chose the elements we thought could use some narrative from the quest. The elements we chose were the frog and the spider since they were also game characters – they would benefit from having some narrative background so that their dialogue would have something to base itself on. It would also make the player experience more immersive if the game’s characters had some depth to their personality.
Additionally, we already had some criteria for the frog and spider’s personalities we could use as foundations for creating their narrative.
Criteria: The frog should have a bad personality to make the player want to kill it. The spider had to have a good personality to deter the player from any murderous intents. The frog doesn’t want to leave its pond The spider doesn’t want to leave its web
Frog: We decided to create the narrative for the frog first as it was the first character the player would encounter in the game. Since the frog was supposed to refuse to leave its pond, we first discussed ideas for why the frog wouldn’t want to leave its pond.
I suggested that the reason would be because the frog is an old frog who has been around since before mutations started occurring, and it hates the new mutated world. It wants to avoid any mutated animals so it doesn’t leave its pond. It would also have to be in denial about its own mutations if this was the case since the frog is also supposed to be a mutated animal. This additional aspect suited the concept of an old, stubborn and prejudiced frog so we decided that the idea was a sound one. These character traits could also explain why the frog has a bad personality.
Spider: For the spider, we needed a reason for why it would refuse to leave its web. I suggested that it could be because it’s scared of the tiger destroying its web again – since the tiger is supposed to be terrorising the forest and destroying habitats, the idea suits the game’s existing lore. The spider could have had an old web, which was destroyed by the tiger once it had left it unattended. Now, it is paranoid because it thinks if it leaves its web, the tiger will destroy its home yet again. These feelings could easily be shown through dialogue so it was a sound concept to go with.
Additionally, we also needed to explain why the spider would want a flower. It didn’t make sense for the spider to want a flower to eat so we ruled out hunger as a reason. We discussed some more and decided that we should tie the reason into its existing backstory. We theorised that the spider could want the flower simply to brighten its day in the dark times it’s currently facing due to the tiger’s presence in the forest. The notion suited the spider’s gentle nature so we decided to take the idea forward.
Hidden Area Quest
Since this was such a small quest, we didn’t want to attribute too much narrative to it – it was an unnecessary task. Therefore, we decided to keep this quest’s narrative solely to some environmental storytelling.
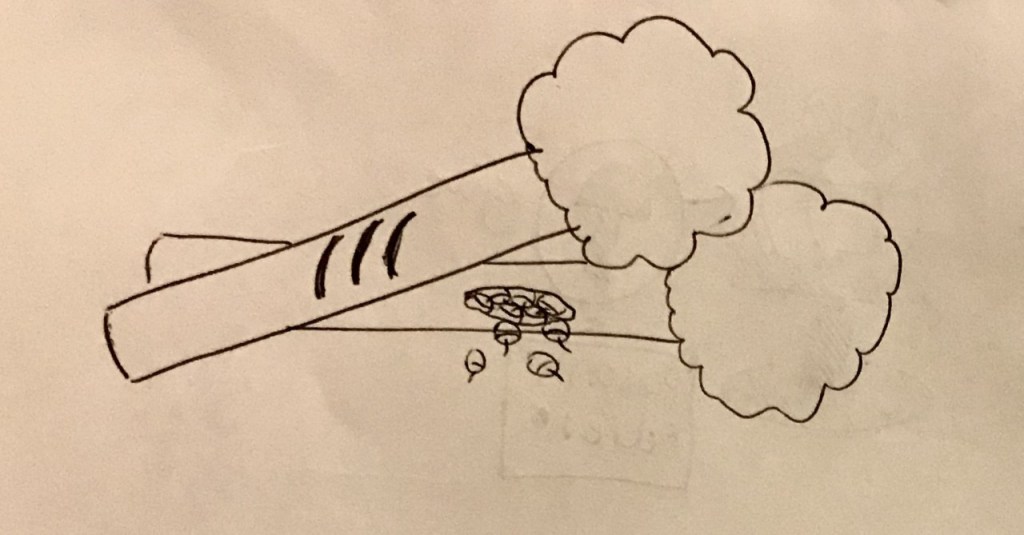
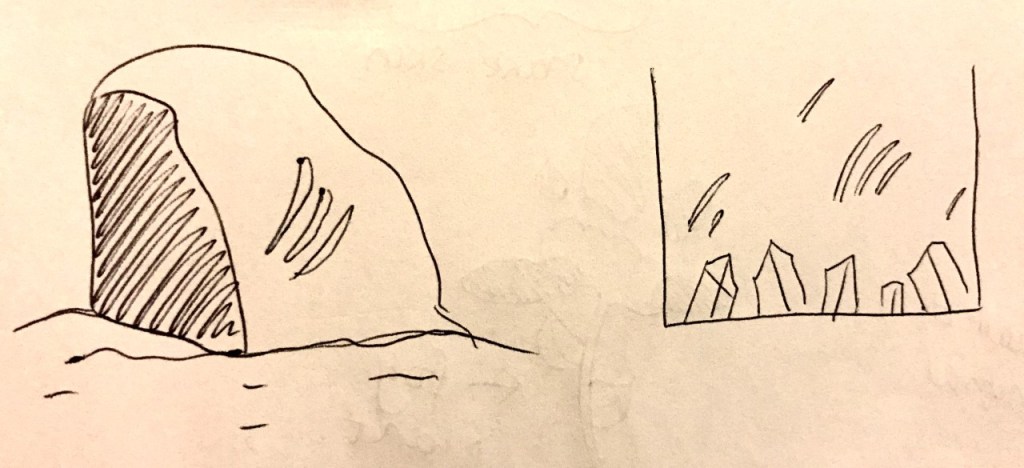
Firstly, we thought we could hint at the reason behind the fallen trees’ existence. We thought that attributing it to the tiger would be a reasonable notion to go with. Next, we discussed ways in which we could hint at the tiger having been there at the scene. We talked about using tiger claw marks would be a good method of implying the tiger’s presence – they could appear on the trees’ bark.
Furthermore, I suggested that we make one of the trees into a habitat to showcase a destroyed habitat in the game. This would further display to the viewer the amount of havoc the tiger has caused in the forest. I stated that we could insinuate that one of the trees was once a habitat by making the tree have a hole in it that was overflowing with nuts. This would imply that a squirrel once lived there.
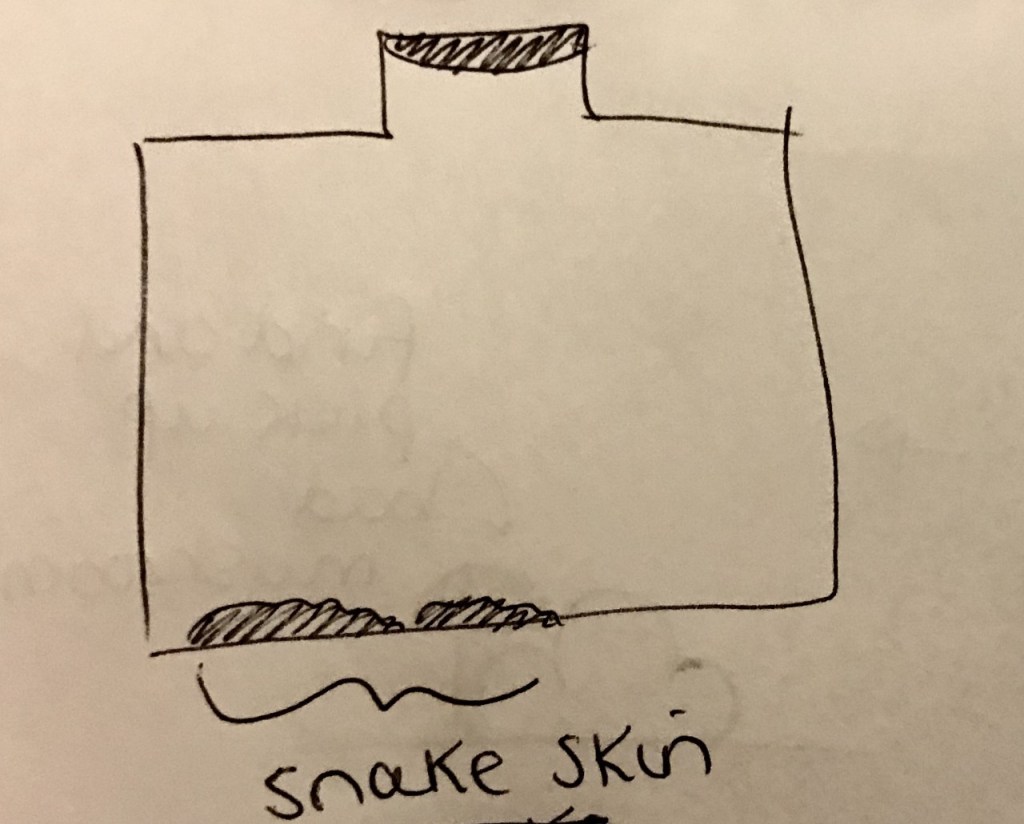
Additionally, we thought we could add some environmental storytelling to the snake burrow by placing some snake skin that had been shed in the burrow – this would imply that the burrow used to belong to the snake but has now been abandoned.
Snake Quest
The key elements we picked to attribute narrative to were the snake and the skunk, since they were the two characters involved in this quest.
Snake: The snake’s narrative didn’t need to have much depth as it didn’t have any dialogue so its narrative could only be implied through visual clues. Therefore, we decided to keep its narrative short and simple. We only needed to discuss the reason for why the snake was sleeping on the path, which was partially covered in the ‘hidden area quest’ narrative discussion. We just chose to elaborate on the existing narrative – the snake’s old habitat (the snake burrow) was destroyed by the tiger so the snake no longer has a home to sleep in. This is why it is sleeping on the path.
Skunk: Part of the skunk’s background has already been established in Task 2.1 – Puzzles. The reason the skunk is scared of the deer after it wears the seaweed is because the seaweed makes the deer look like it has stripes – this reminds the skunk of the tiger. The only thing we had to further discuss in regards to the skunk was the reason for why it was hiding in the first place. We decided to go with a simple, reasonable answer – the skunk is hiding from the tiger. The skunk’s narrative didn’t need to be too extensive as it didn’t have any dialogue that could showcase its narrative so we kept it brief.
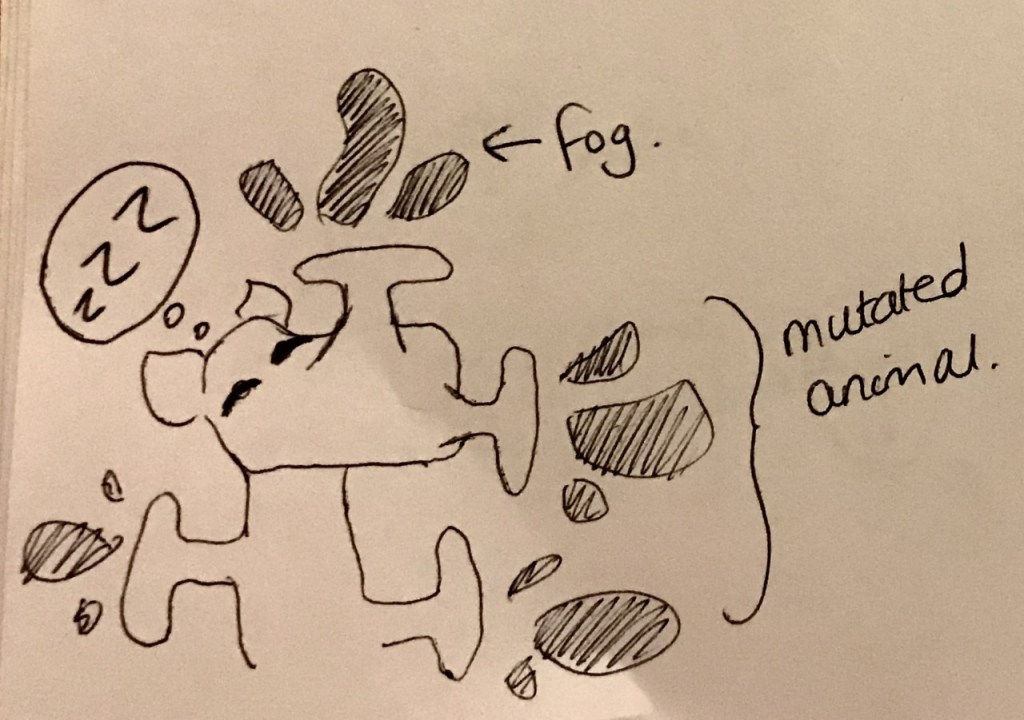
Fog Quest
For the fog quest, we wanted to keep the narrative simple as there was no dialogue involved so its narrative could only be shown through visual clues/environmental storytelling.
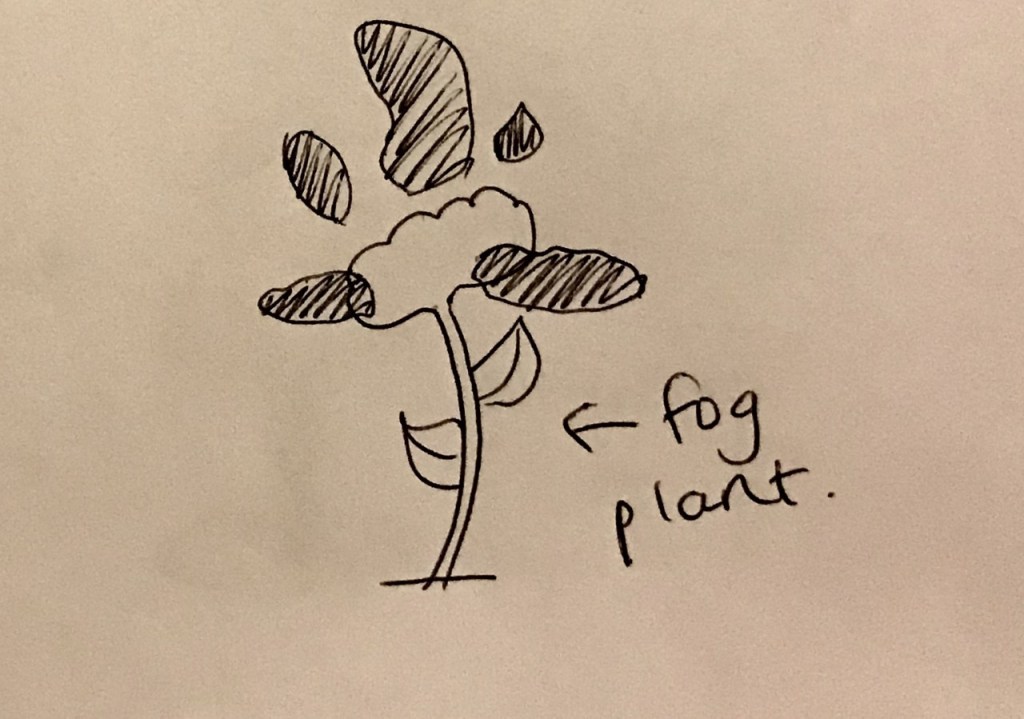
We decided that the only narrative element we needed to discuss was the reason behind the fog’s existence. We chose to keep this answer simple and create a ‘fog plant’ that creates fog just as the ‘wind plant’ creates wind – this logic follows the existing laws of the game world. However, we thought that this explanation wasn’t sufficient as it didn’t explain why there was such a large body of fog in only one area of the game world – surely a single plant could not be the cause for this.
After some discussion, I suggested that the fog could have been created by a mutated animal that had been sleeping in the area – it had been exhaling large amounts of fog continuously in its sleep. Furthermore, the animal could have eaten a lot of fog plants so that it mutated to have multiple orifices that exuded fog. These notions could account for the thick fog that covers the area. Additionally, fog plants could be scattered throughout the game to make the player aware of its existence – the fog plants could have a small fog surrounding them to explain how much fog one usually emits.
We also discussed what would happen after the fog is cleared by the wind plant – we would have to get rid of the mutated animal to stop the fog from coming back. I suggested that we could just have the animal wake up from the wind and run away soon after.
Plant Quest
For this quest, we needed an explanation for why the frog asks the deer for the impossible. We decided that the frog knows that the task is impossible and wishes to trick the deer out of a simple desire to make another suffer from frustration. This notion supports the frog’s bad personality.
Next, we discussed what the frog’s feelings would be when the deer gives it the fake flower, which it assumes is the real flower. We decided that it could be a moment of redemption for the frog’s character – this could be a way of showing the player that the frog isn’t that bad after all since they are supposed to befriend it. We decided that the frog could feel awe and touched that the deer would to such lengths to get it the flower – the frog reluctantly feels bad about its rude attitude.
Smaller Quests
Since these quests were short and simple quests, we decided to make their narratives equally short and simple.
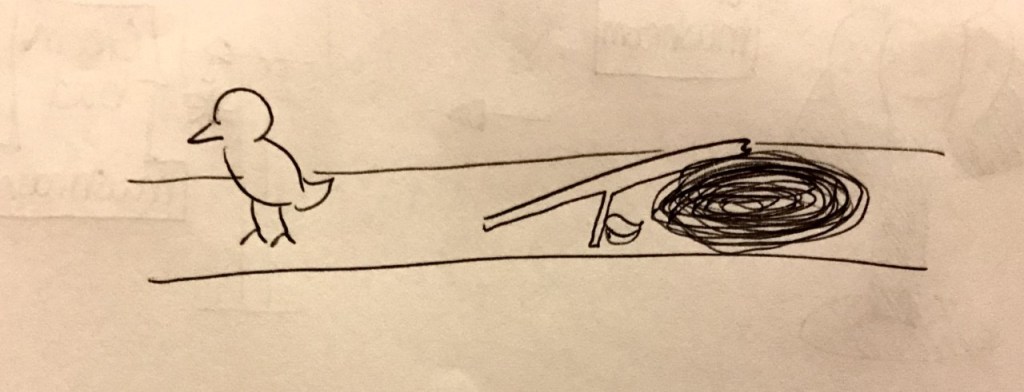
Bird Quest
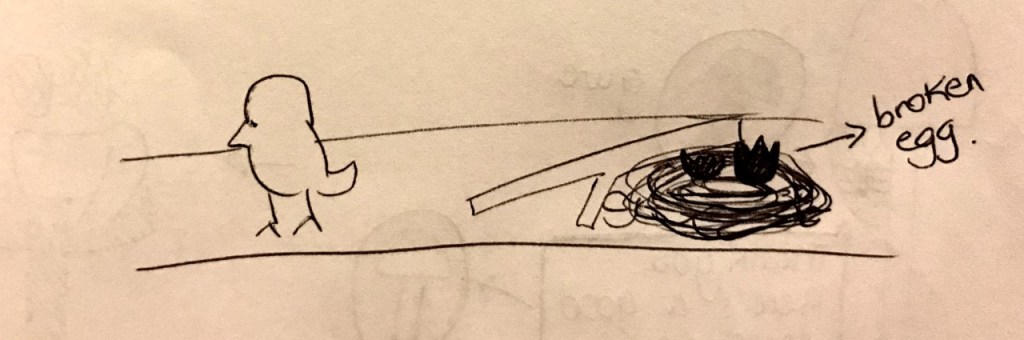
For the bird quest, we just needed a reason for why the bird is apart from its mother. We discussed how we could imply a narrative through environmental storytelling in this quest. I suggested that we have the bird appear near a broken branch, which has a ruined birds nest next to it. This would imply that the bird’s home was destroyed and thus, was currently homeless.
However, this didn’t explain why it had been separated from its mother – surely its mother would either have taken the bird with her or the bird would have followed her when she had left. After some discussion, we decided to make the bird a baby bird that was newly hatched – it had hatched after the mother had left. This meant that the bird couldn’t have followed its mother or been taken by its mother when she left. In order to showcase this, we decided to place a broken egg in the ruined birds nest to suggest that the bird had recently hatched from it.
Rhino Quest
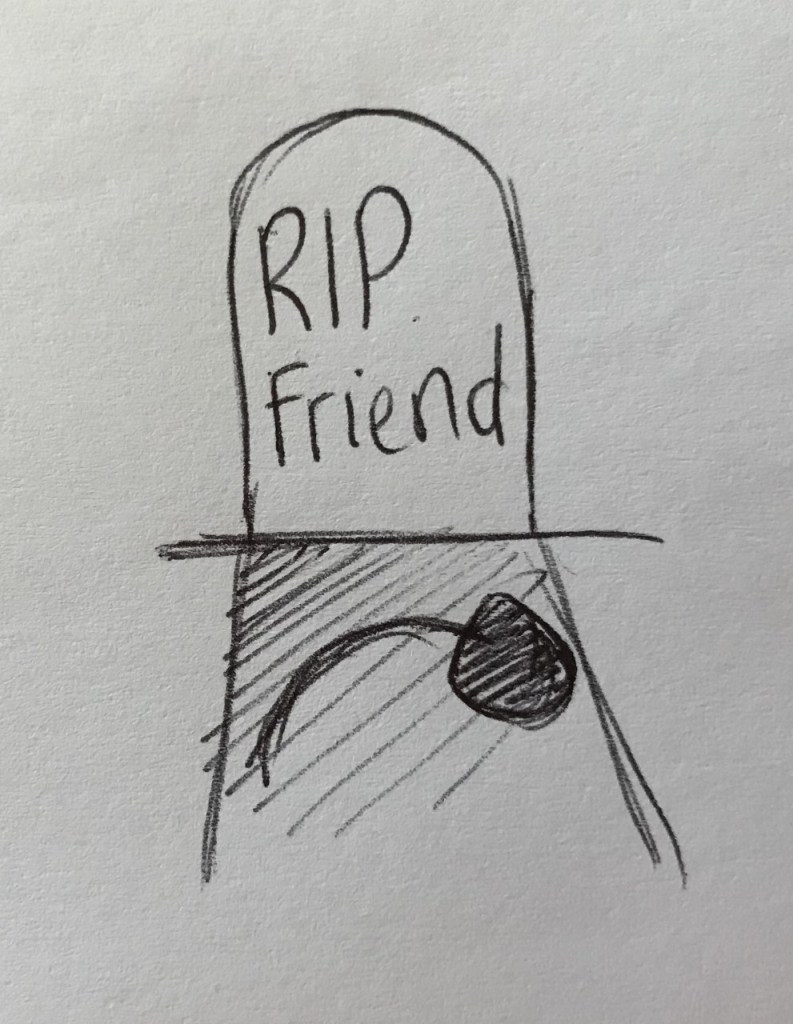
For the rhino quest, we needed to create a reason for why it is trying to play a tune with the bell flowers. I suggested that the song could be for the rhino’s late friend, who had loved that song and used to sing it for the rhino. As an example, I made the friend a bird since birds were known for singing. This notion could be shown by placing a gravestone near where the rhino resides and having the rhino look at it to show its significance. The bird friend could’ve also loved bell flowers, which explains why it is buried near some and why the rhino is specifically trying to play bell flowers. To signify this, there could be a bell flower on the the bird friend’s grave.
We also discussed how we could show the player what tune to play since they needed to help show the rhino how to play it. We theorised that it would make sense for the bird friend’s song to be a tune its species if known for singing. Some of these birds could be scattered throughout the game, singing the tune periodically.
Crystal Quest
For the crystal quest, we only had to explain why the crystals were dim. We decided to keep it simple and attribute it to the tiger trying to destroy the cave. We could have claw-marks appear on the cave walls (interior and/or exterior) to imply this.
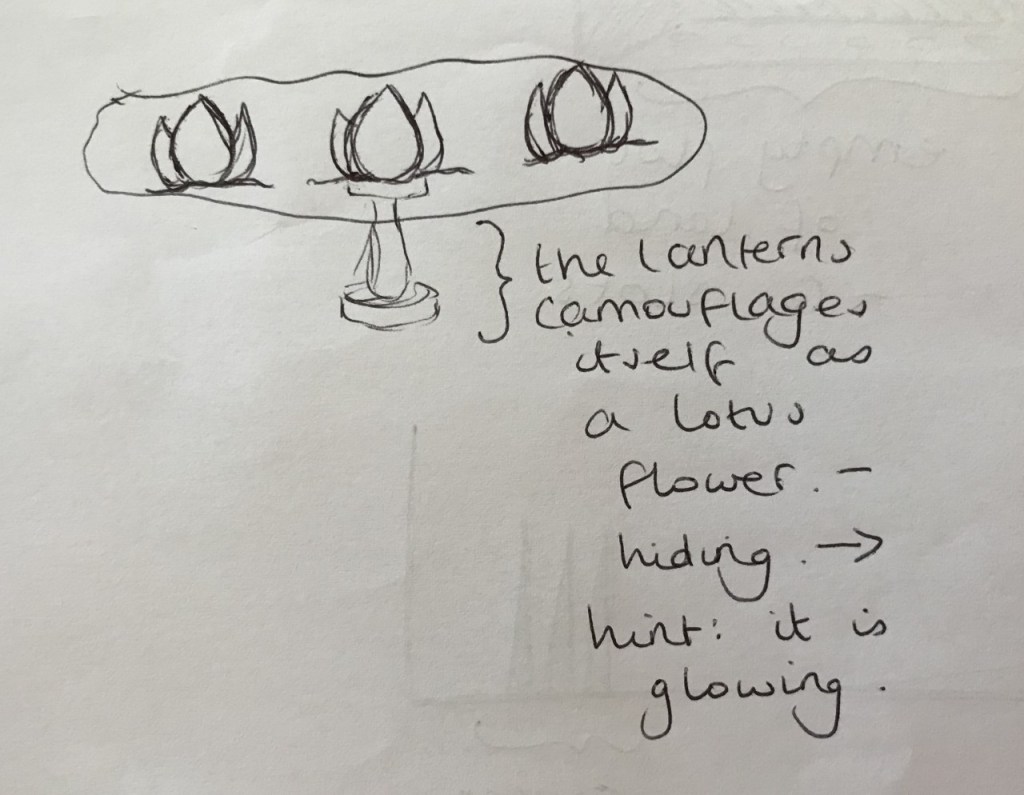
Additionally, we decided to further elaborate on the lotus lantern. We thought we could make the lantern camouflage itself in a lotus pond so that it looks like a normal lotus flower – its bottom flower is hidden underwater. As a method of implying to the player which lotus is the lantern, we could have the lantern glow periodically.
Mushroom Farm Quest
For the mushroom farm quest, we needed to explain why a bunch of carnivores had taken over a mushroom farm. I suggested that it could be due to the carnivores having mutated to want/need mushrooms in their diet. This would ruin the ecosystem and create too high a demand for mushrooms for the forest to be able to satisfy it. This could be shown through the carnivores’ mutated appearances.
Since the carnivores are bigger and more threatening, the smaller animals that also eat mushrooms are too afraid to go near the mushroom farm – this means they now lack a supply of mushrooms. This could be implied by having the smaller animals hide near the mushroom farm and look at the mushrooms forlornly. This is why the player needs to help them create a new mushroom farm in the hole. We made the new farm appear down a hole since we needed a way of preventing the carnivores from taking over the new farm.
The frog is old and has been around since before the rainforest mutated – it is in denial about its own mutated state. It doesn’t want to interact with the new mutated world and so refuses to leave the pond.
The spider doesn’t want to leave its web – its old web was destroyed by the tiger and it is afraid that if it leaves its web, the tiger will destroy it again. It wants the bad mushroom because of its beauty – looking at it brings the spider joy in these dreary times.
The bad mushroom is severely poisonous. If it is eaten, the consumer will die.
The good mushroom is rumoured to be the most delicious mushroom in the mushroom forest.
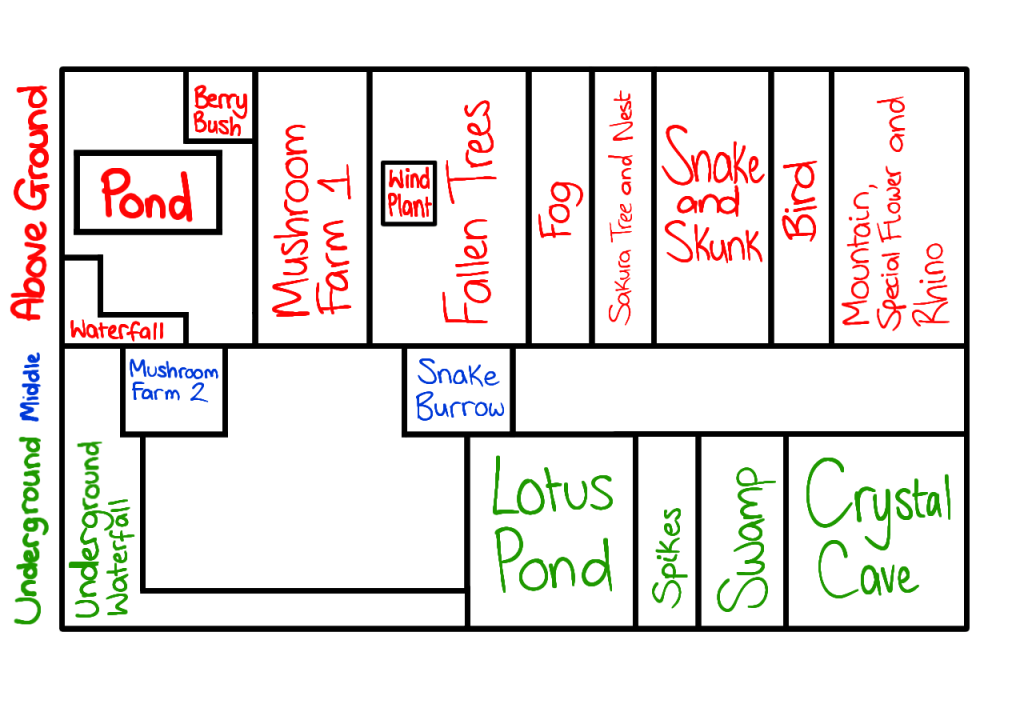
Make the swamp level, with a mushroom forest as the environment. Make five main quests and four smaller quests. For the quests list, go to Puzzle List 1.0. For the assets list, go to Interactive Assets List 1.0.
Environment Layouts 1.0
Scope – version 2.0
Make the swamp level, with a mushroom forest as the environment. Make four main quests and one smaller quest. For the quests list, go to Puzzles List 2.0. For the assets list, go to Interactive Assets List 2.0.
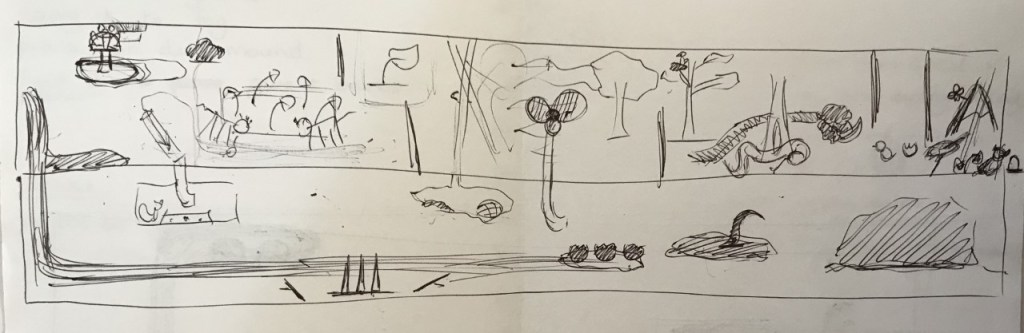
Environment Layouts 2.0
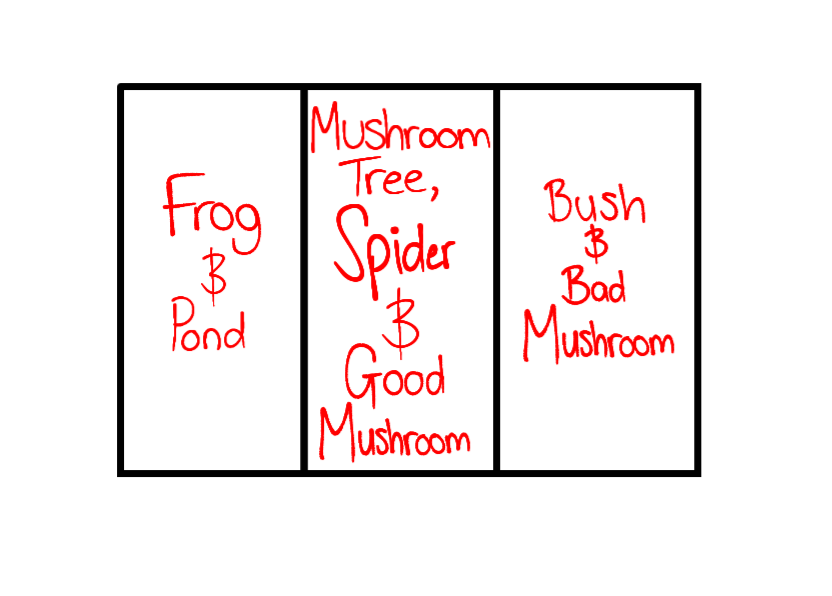
Scope – final version
Make the swamp level, with a mushroom forest as the environment. Make one main quest. For the quests list, go to Final Puzzles List. For the assets list, go to Final Interactive Assets List.